How to Build a Kitchen Sink Cabinet Easy

Get custom cabinets on a upkeep by making them yourself! Acquire how to build a simple cabinet box with quick and easy frameless structure.

Edifice cabinets sounds like a large, scary project, simply information technology'due south actually simply a bunch of boxes! In this cabinetry series, I'll first evidence y'all how to build a simple cabinet box. In later tutorials, I'll go over how to add drawers, pull out shelves and hidden trash can compartments to customize your base cabinets.
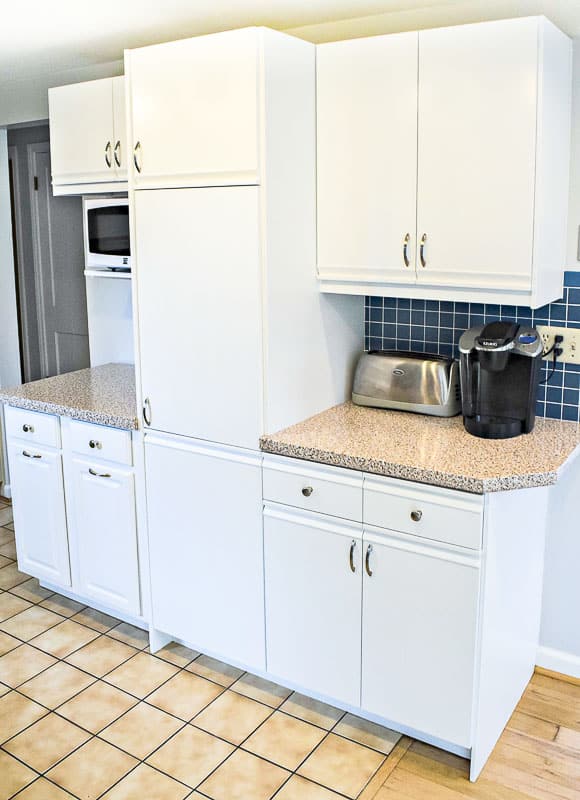
I'm building these cabinets as part of my long-awaited kitchen remodel! I've painted the cabinets and backsplash, and covered the countertops with contact paper to make information technology less terrible, just it's time to rip off the bandaid and start from scratch!
I'll be working on this huge projection in sections, starting with this random grouping of cabinets. It will be transformed into a symmetrical bank of upper and base of operations cabinets with a long countertop spanning the entire wall.
Once the base cabinets are installed, I started building the DIY wall cabinets. I'm hoping that by working in sections similar this, I'll minimize the disruption in the kitchen and I won't run out of room in my workshop!
Don't forget about the doors! Check out this article about the different types of chiffonier doors to learn more about the various styles to choose from. Once you've decided on a style, download my free worksheet to help mensurate for cabinet doors correctly!
This post contains chapter links for your convenience. Purchases made through these links may earn me a small commission at no additional price to you. Delight visit my disclosures page for more than information.
Things to Consider
Earlier you kickoff cutting and assembling, there are a few things y'all should consider. By planning ahead, y'all can prevent a lot of errors and build a better chiffonier box!
Choose your plywood wisely
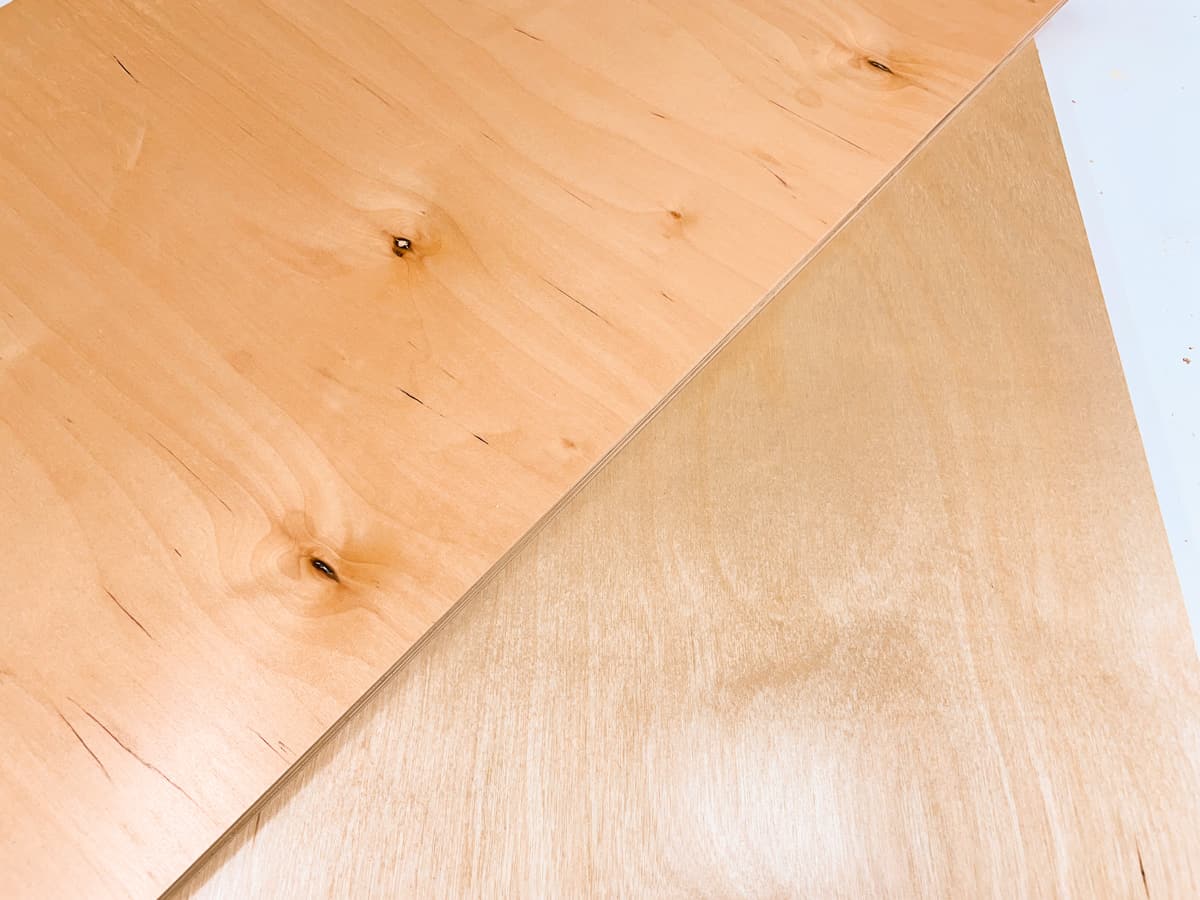
There are a lot of choices when it comes to the different types of plywood, but not all of them are slap-up for edifice cabinets. Typically, y'all desire to look for sheets that are labeled "chiffonier form" for better quality. If y'all're putting in all this effort, spend a few extra bucks to ensure that they last and expect good!
In that location's usually a "good" side to the plywood canvas. This side should be free from knots and imperfections. The other side will be of a bottom quality, but volition likely exist subconscious, either by the wall, an adjoining cabinet or an finish panel. Utilise the expert side for the interior of the cabinet.
My cabinets are made from prefinished birch plywood (that's why information technology'southward shiny). Prefinished means that a clear protective summit glaze was applied at the manufacturing plant, saving me a ton of time! I plan to paint the doors, drawer fronts and end panels, but the inside of the cabinet will remain natural wood with a clear coat.
Plan your plywood cuts
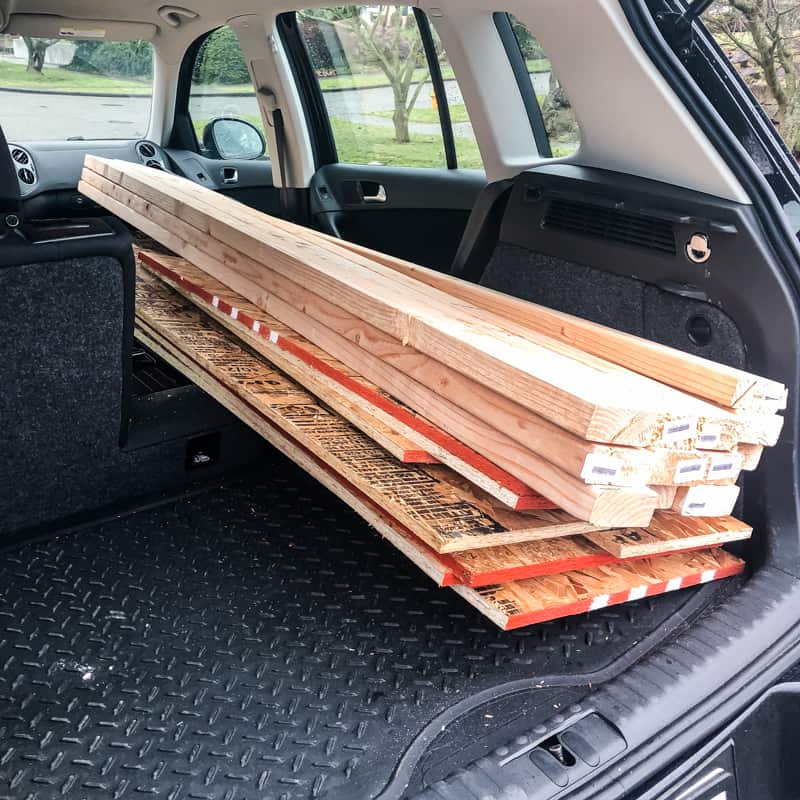
One of the hardest parts about working with plywood is that the sheets are so large! I take ¾" plywood sheets cut down the center lengthwise at the store. This gives me two 2'x8' panels that fit into my auto and onto my workbench hands.
Pay attention to the wood grain direction when planning your plywood cuts. The grain should run vertically up and downwardly the side pieces, and across the width horizontally on the lesser and shelves. If you take the plywood precut to these long strips, the grain management is already right!
Depict out a rough cut diagram to go the all-time apply of your material without a lot of waste matter. I ordinarily plot out the bigger pieces like the sides and lesser first, so apply scraps for the stretchers and nailer strips. I explain the different parts of a chiffonier in this article if y'all're non familiar with these terms.
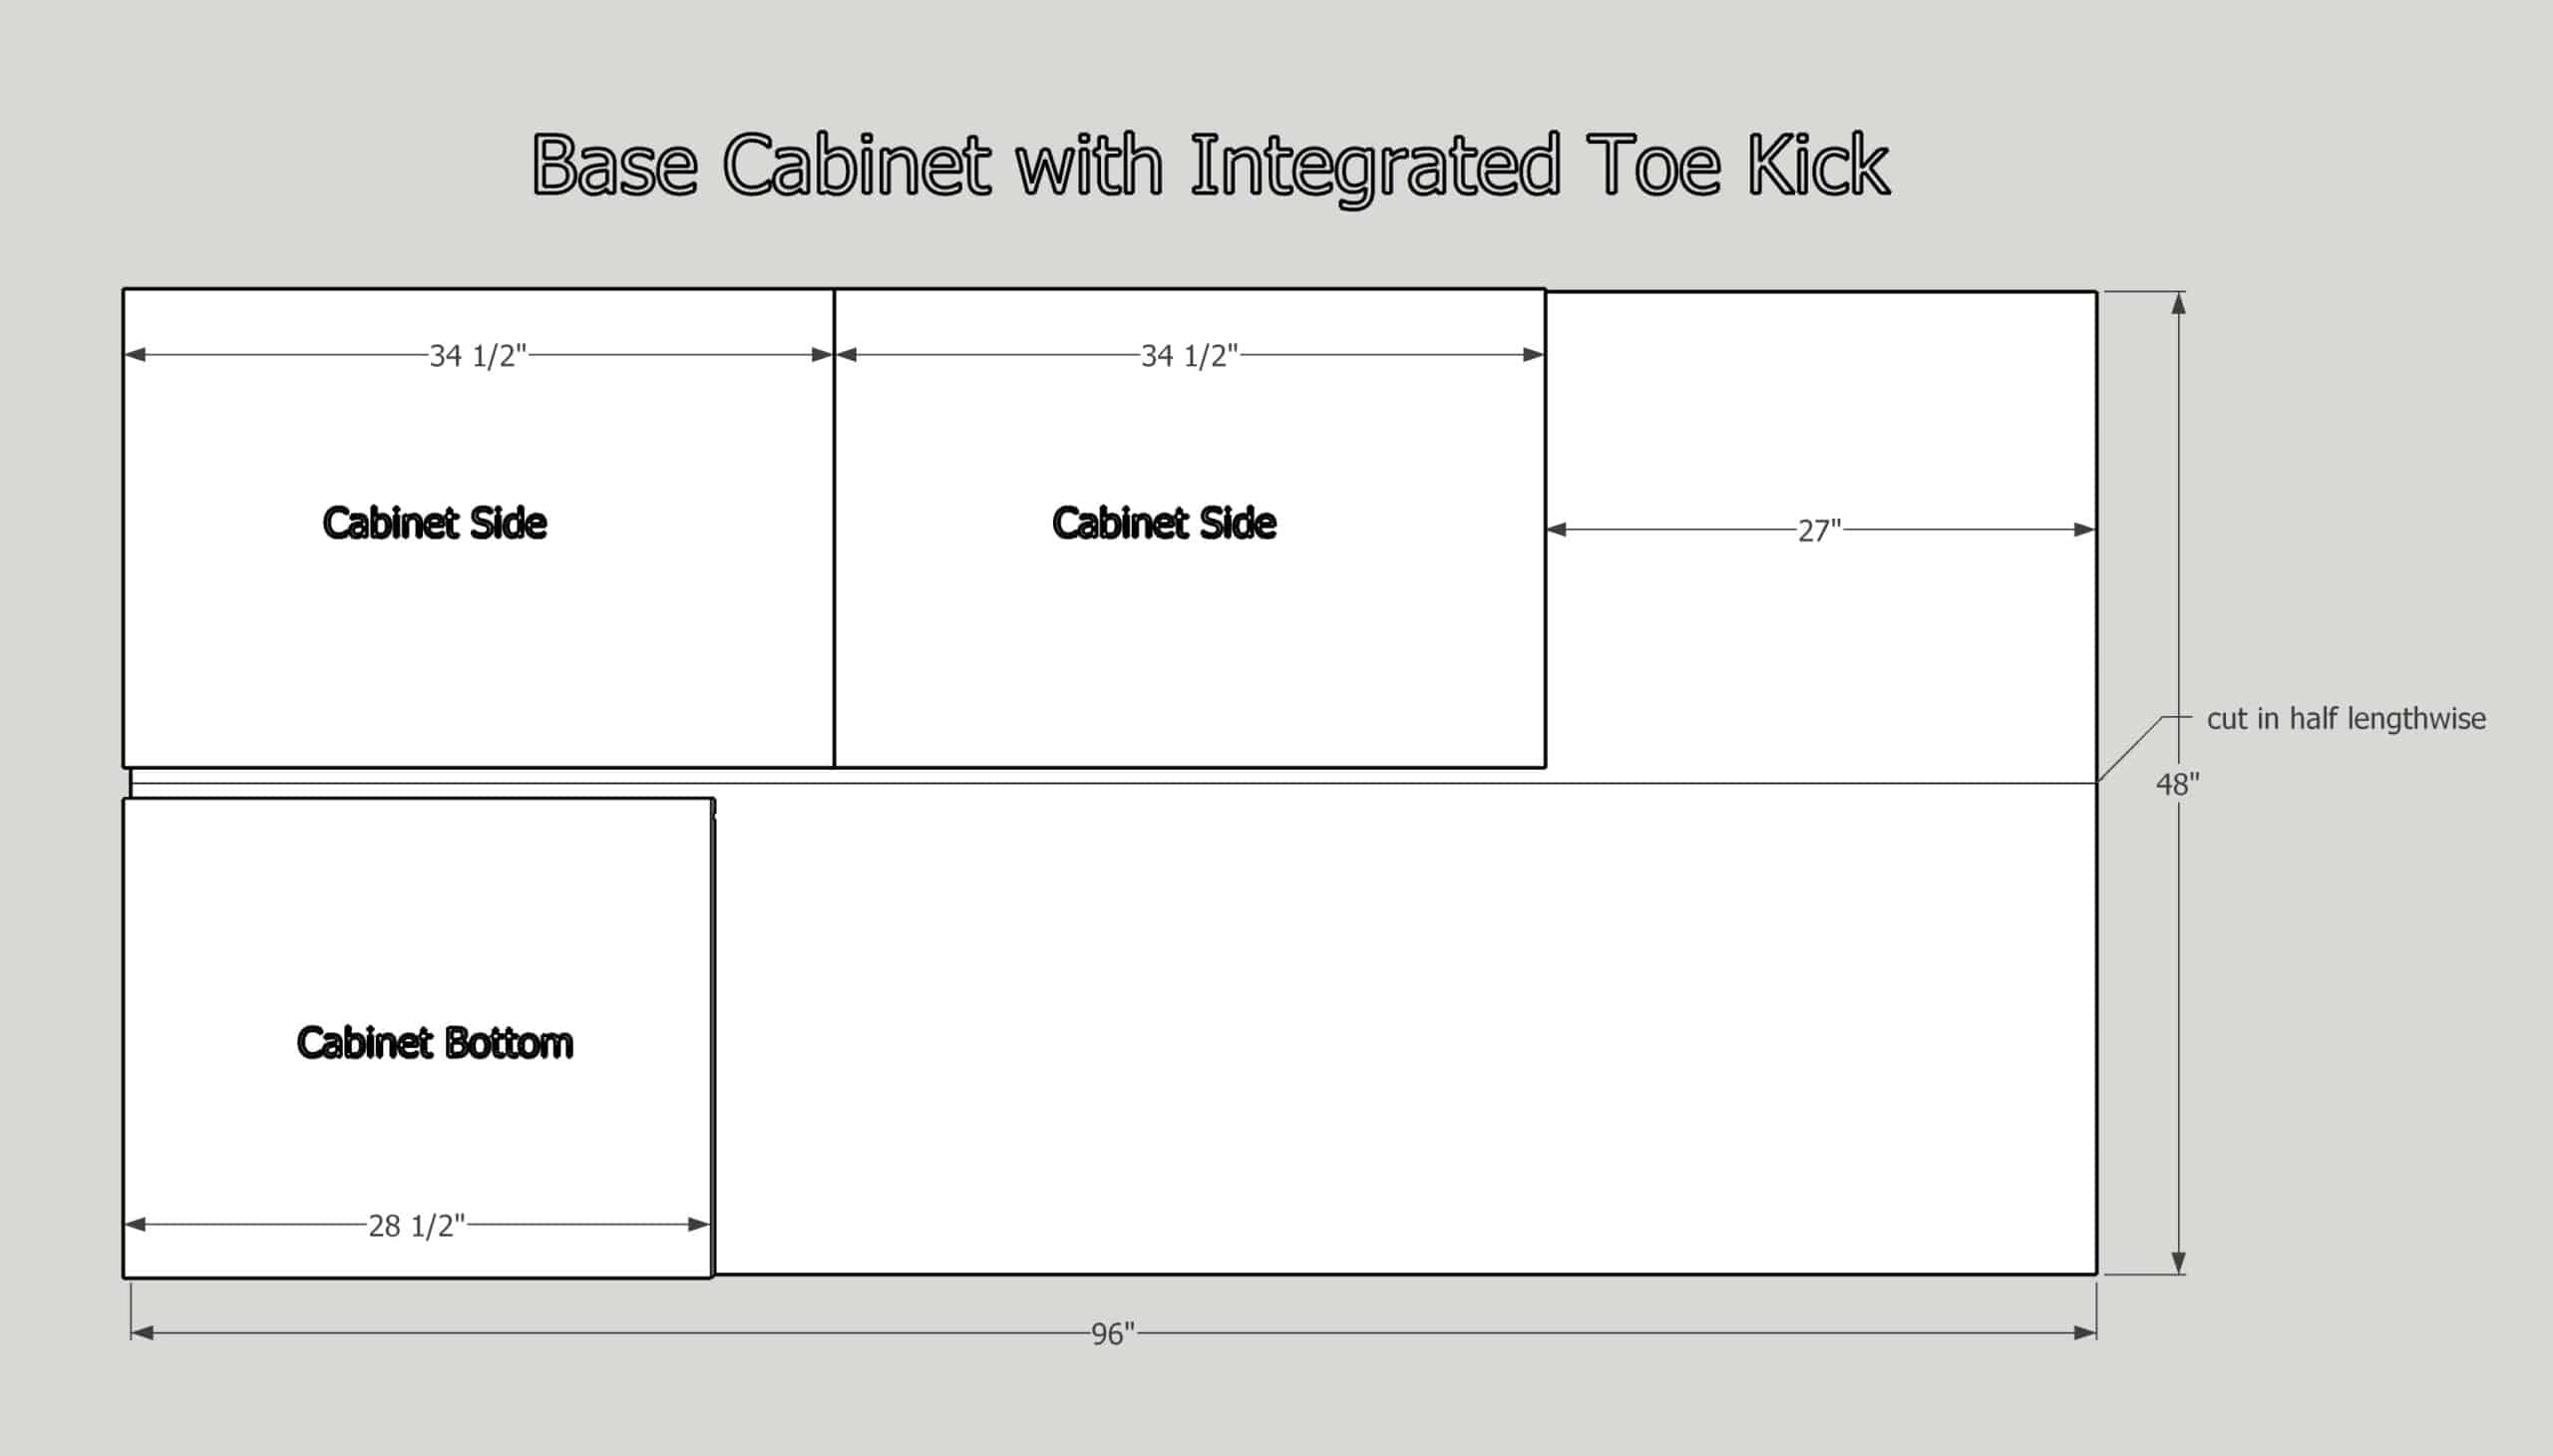
Divide toe kick or integrated toe kick?
The cabinet toe kick is the role at the lesser that raises the box upwards off the floor. It'south gear up back three-4" from the front of the cabinet and 3-4" from the bottom. This gives you room for your feet while you work at the counter, and then you're not leaning over constantly.
There are two ways to create the cabinet toe kick. You can build a separate platform for the cabinet to rest on, or y'all can integrate it into the side pieces and cut out a notch at the bottom.
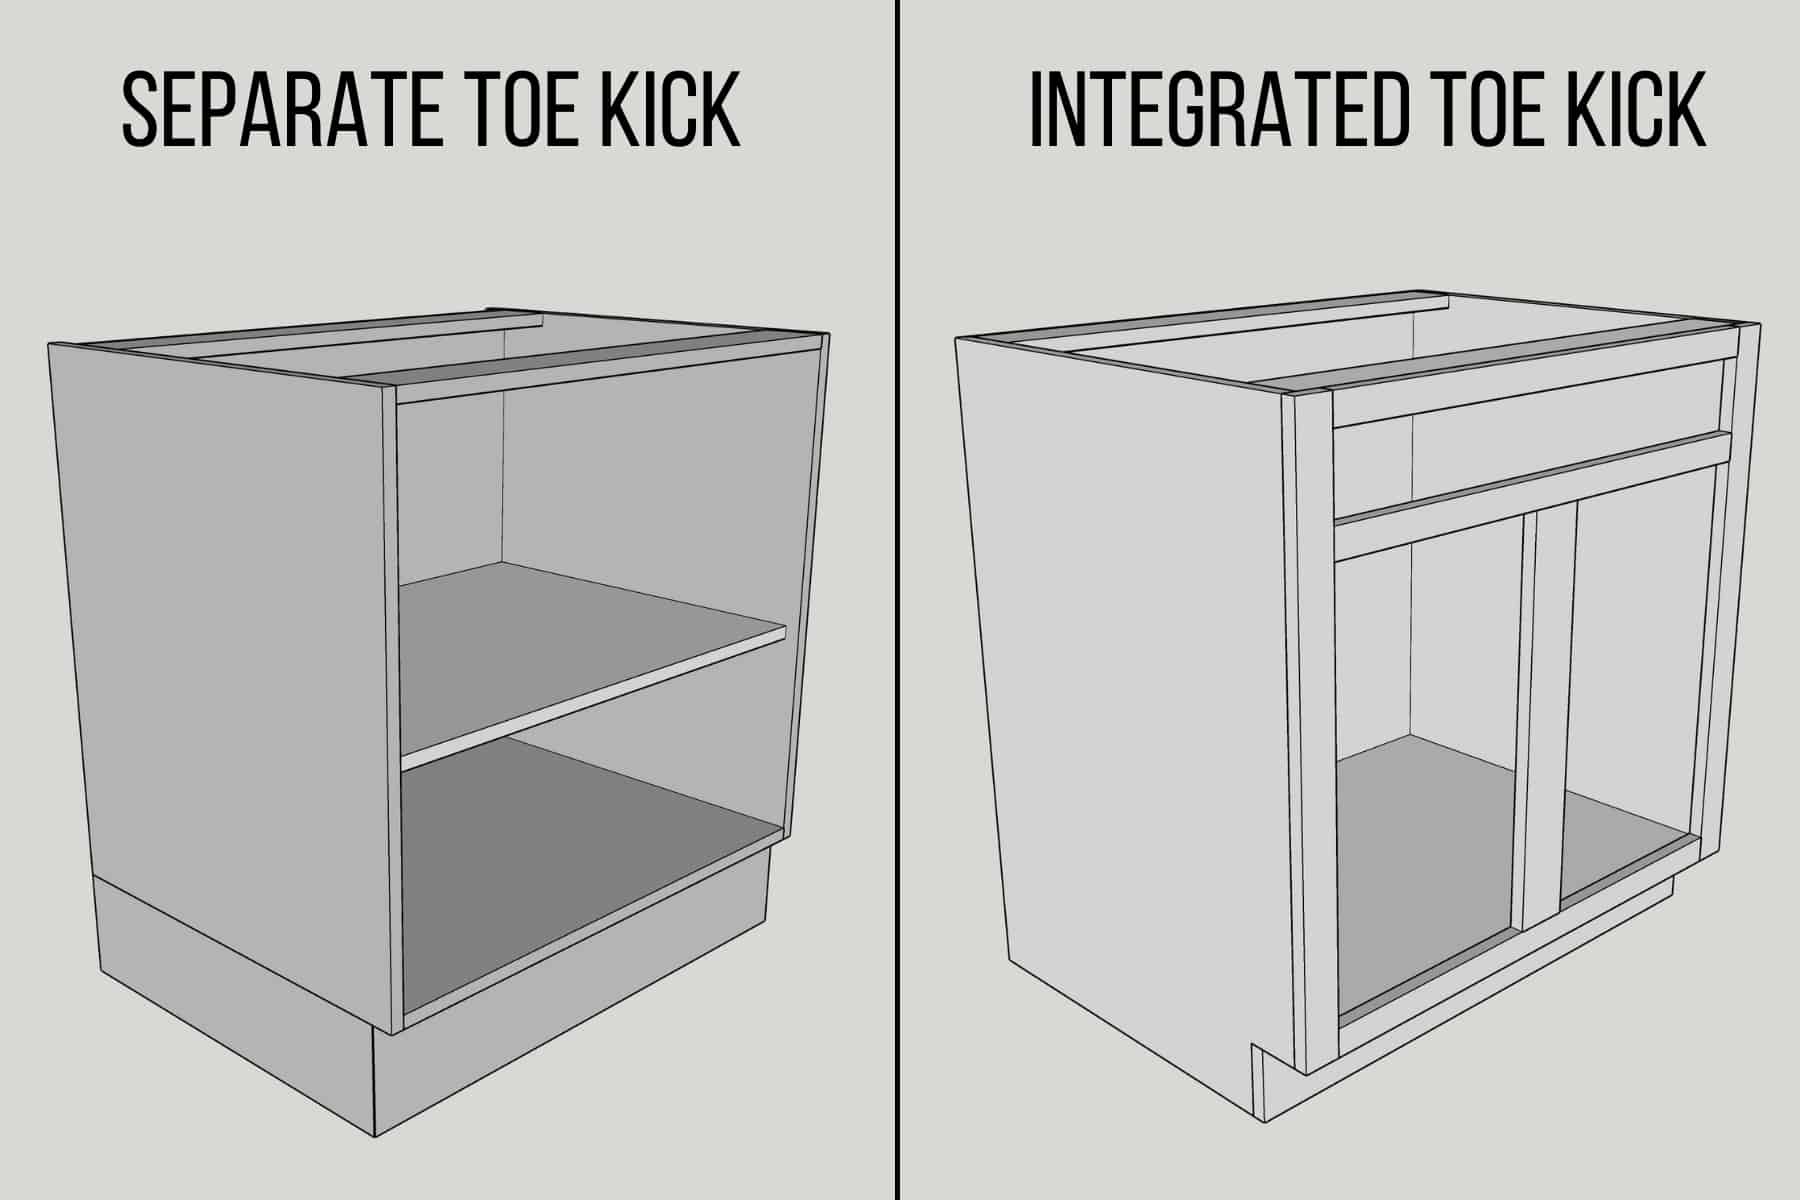
I'm building a separate toe kick platform instead of integrating information technology into the side pieces. This saves on materials, since I'm able to go well-nigh all the pieces for 2 base cabinets out of a single sheet of plywood! Plus, it's easier to level a pocket-sized platform rather than a huge cabinet when information technology's time for installation.
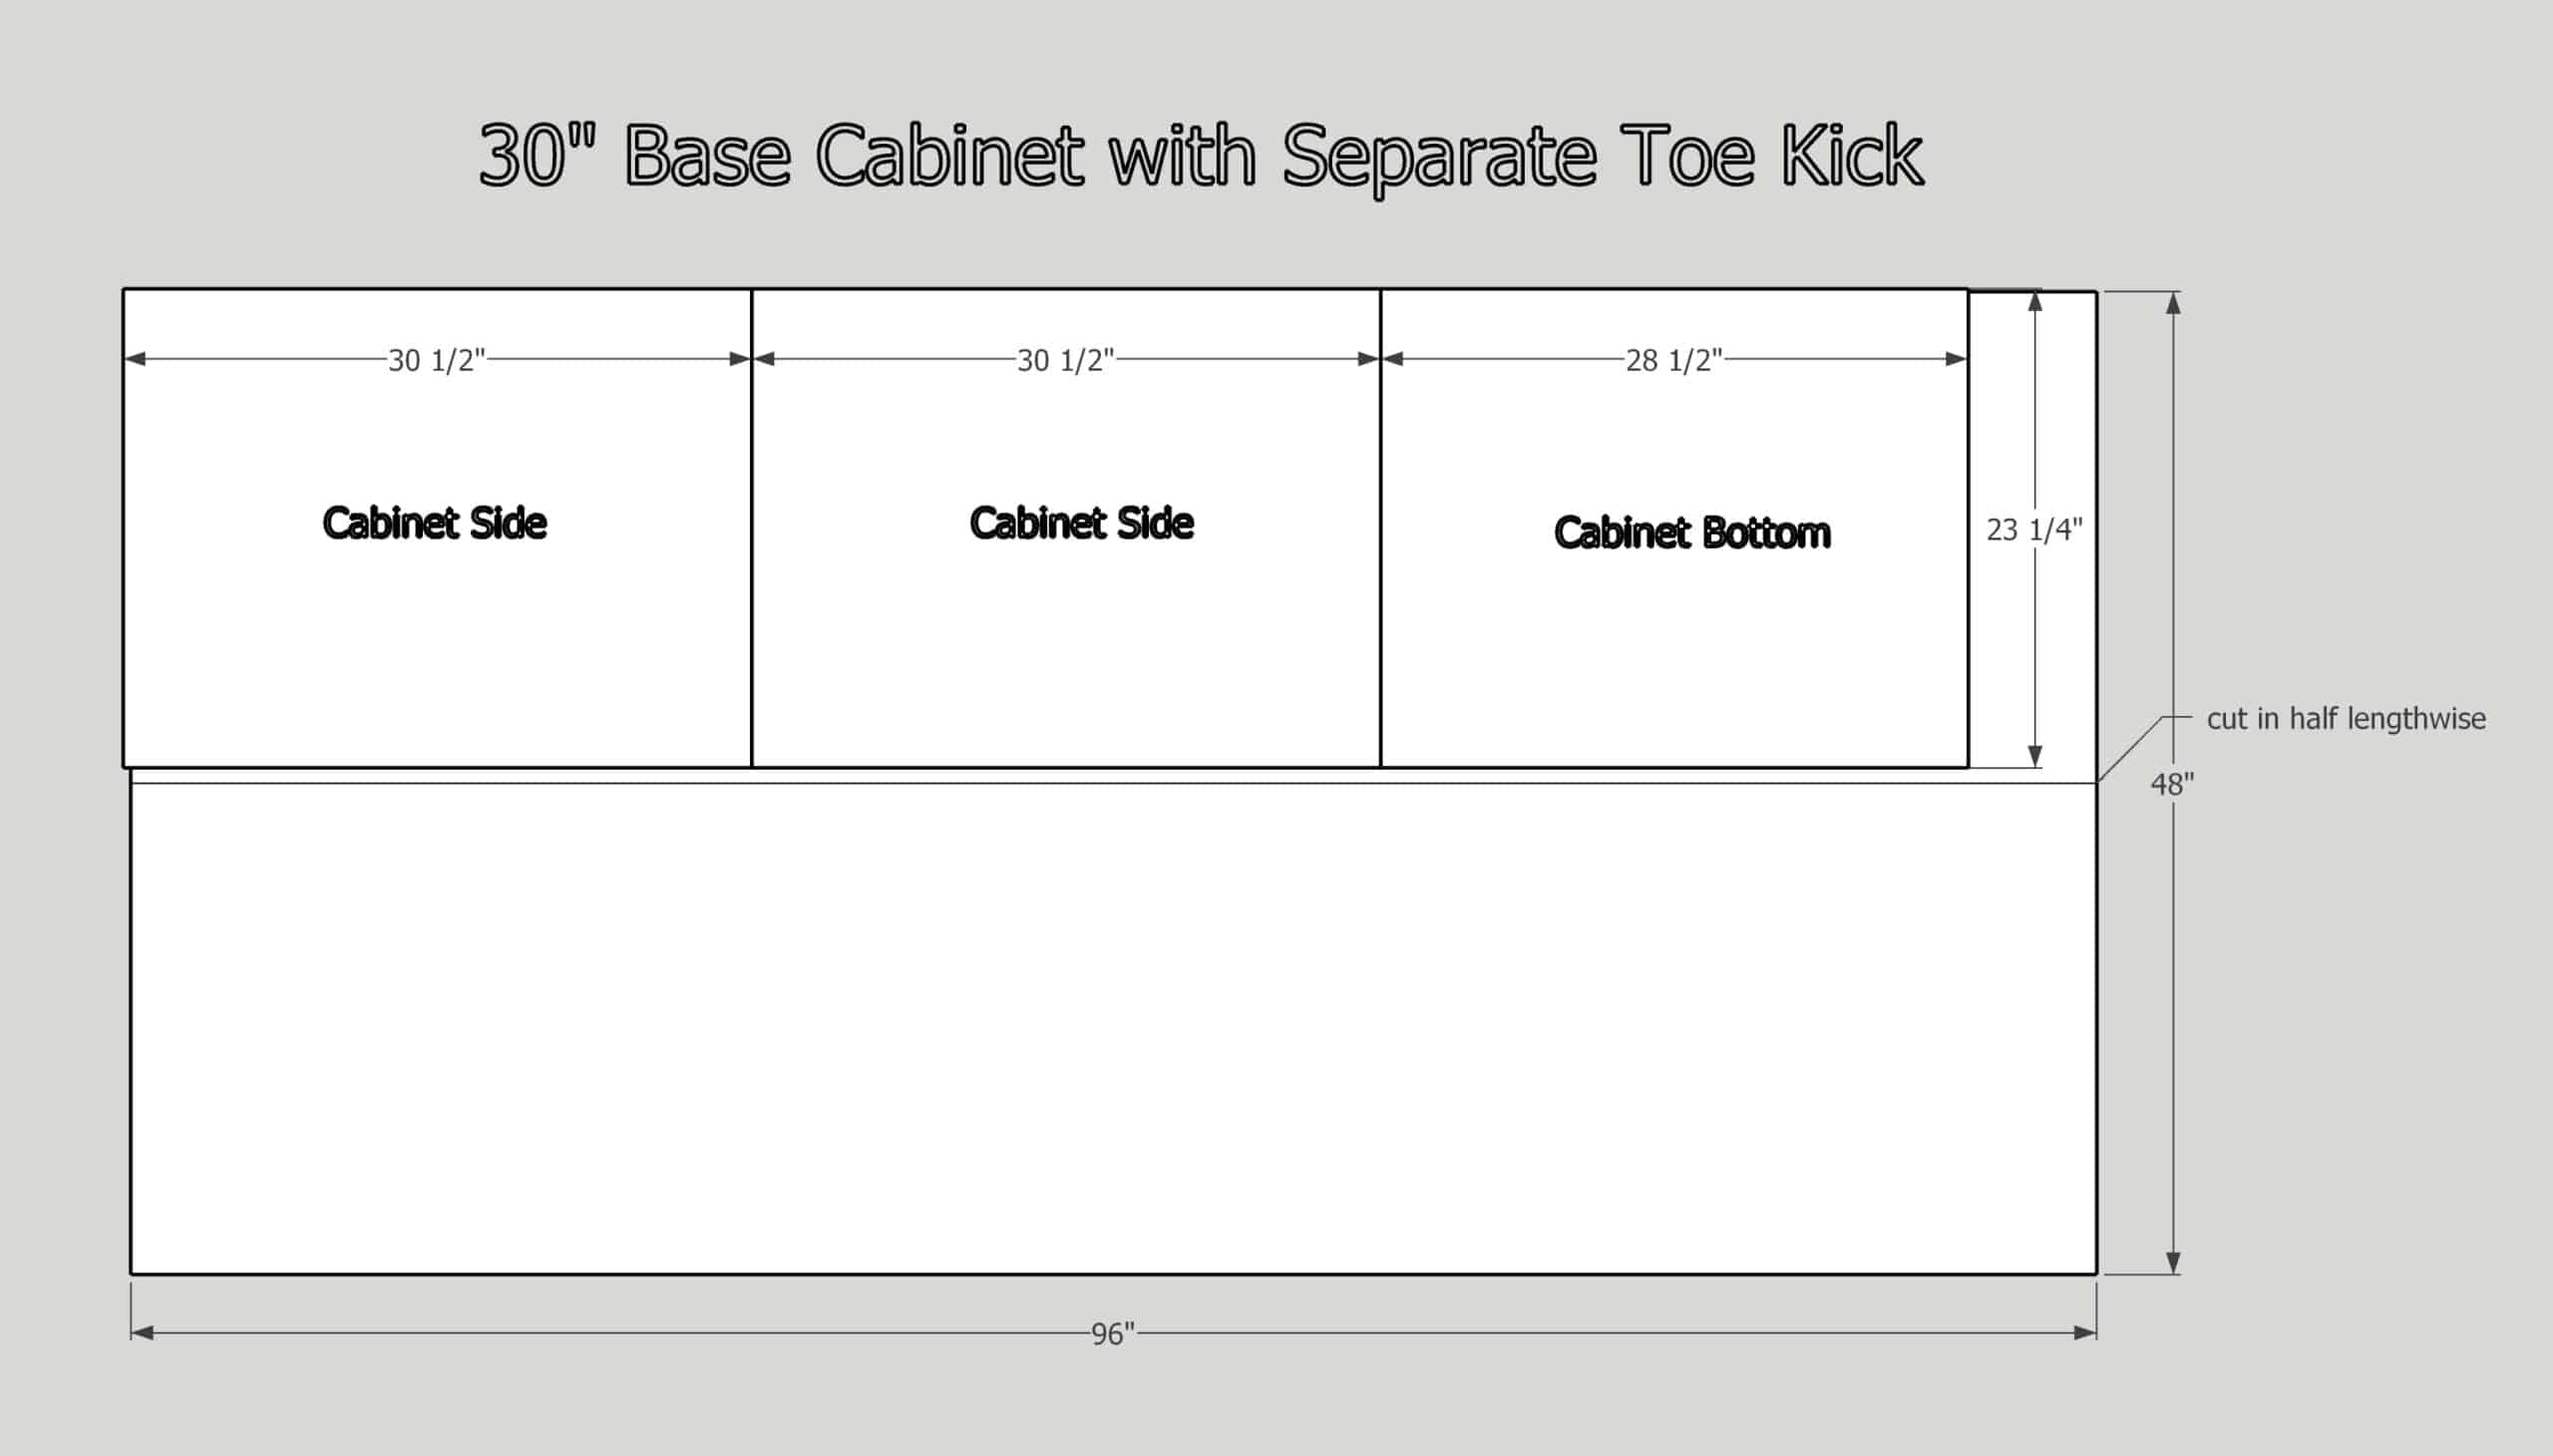
Add iv" to the height of the side pieces for integrated toe kicks. If you're making a standard 30" wide base cabinet, you'll need to use the other half of the sheet for the lesser.
Characterization your pieces
Cabinet box pieces all start to await the same, especially if you lot're making a agglomeration of them at once. Instead of driving yourself crazy trying to figure out which piece goes where, label them as you cut them out!
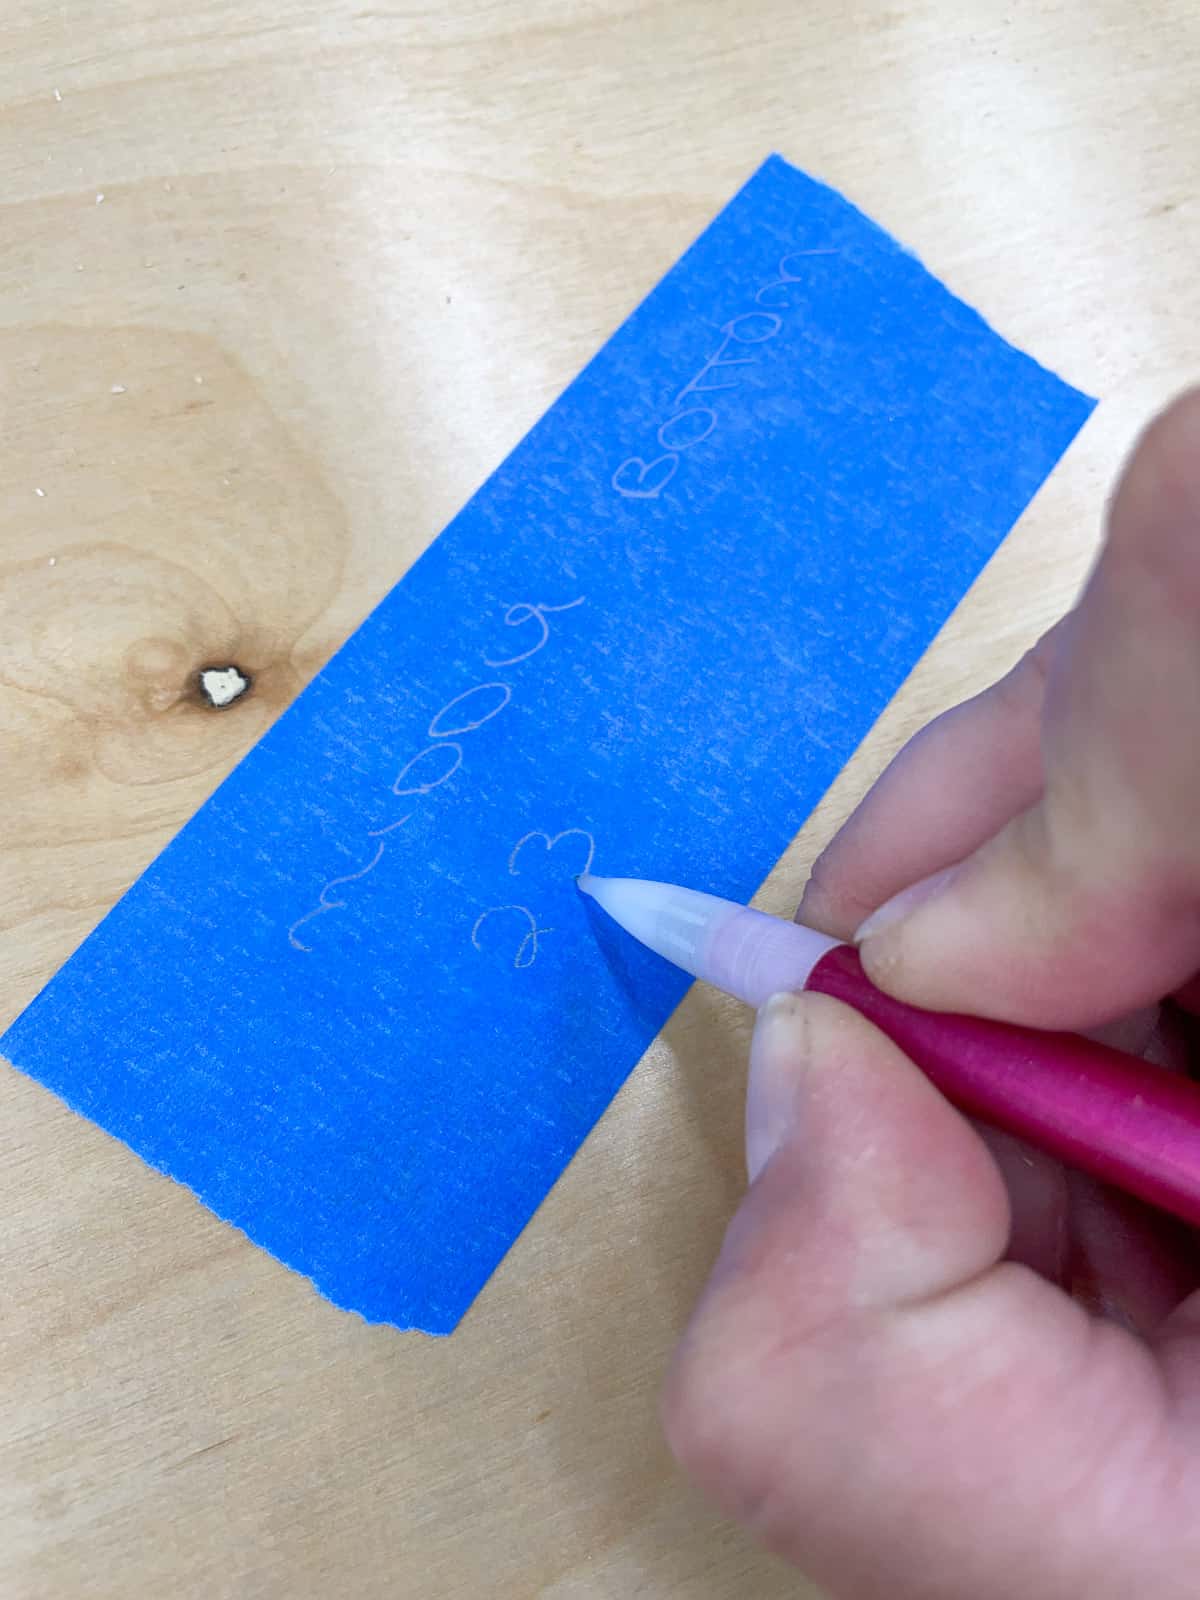
I stick a slice of blue painter's record to every piece with the part proper noun and dimensions written on it. Even if all the pieces are in a giant stack on the workbench, I know which part goes where and then I don't accidentally employ a side piece equally the lesser!
How to Build a Base of operations Chiffonier
Cut the plywood pieces to size
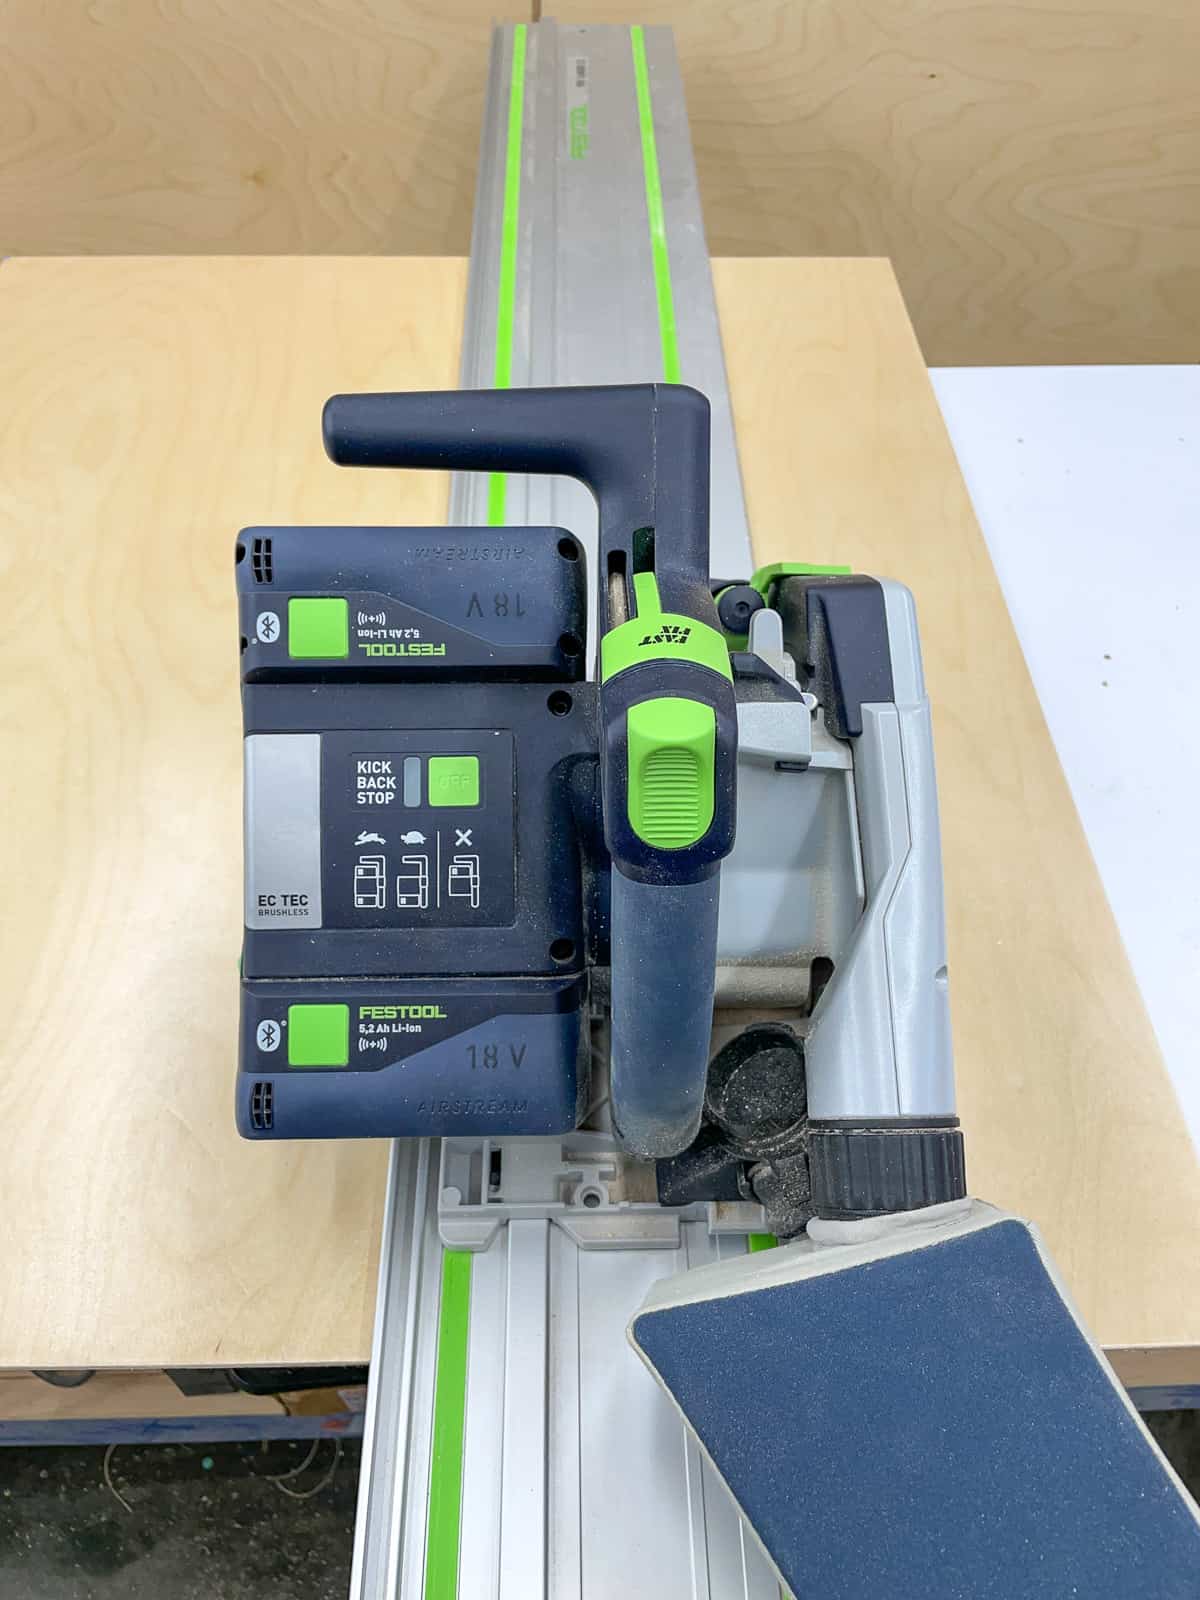
Fifty-fifty though the 2'x8' sheets are a petty easier to handle, they're all the same as well large to push through the table saw safely. I prefer to use a track saw to break down the larger sheets into the crude size needed for each chiffonier part.
You could also employ a round saw, although you lot'll need to use a circular saw straight edge jig to proceed your cuts straight. I have an entire article comparing a track saw vs a circular saw if you're interested in learning more about these two tools.
One benefit of the rail saw is that it can make really clean cuts, simply I however similar to use blue painter's tape to prevent tear out on the cantankerous grain. Make sure to check for square before you lot cut, and utilise the factory edge as your reference edge.
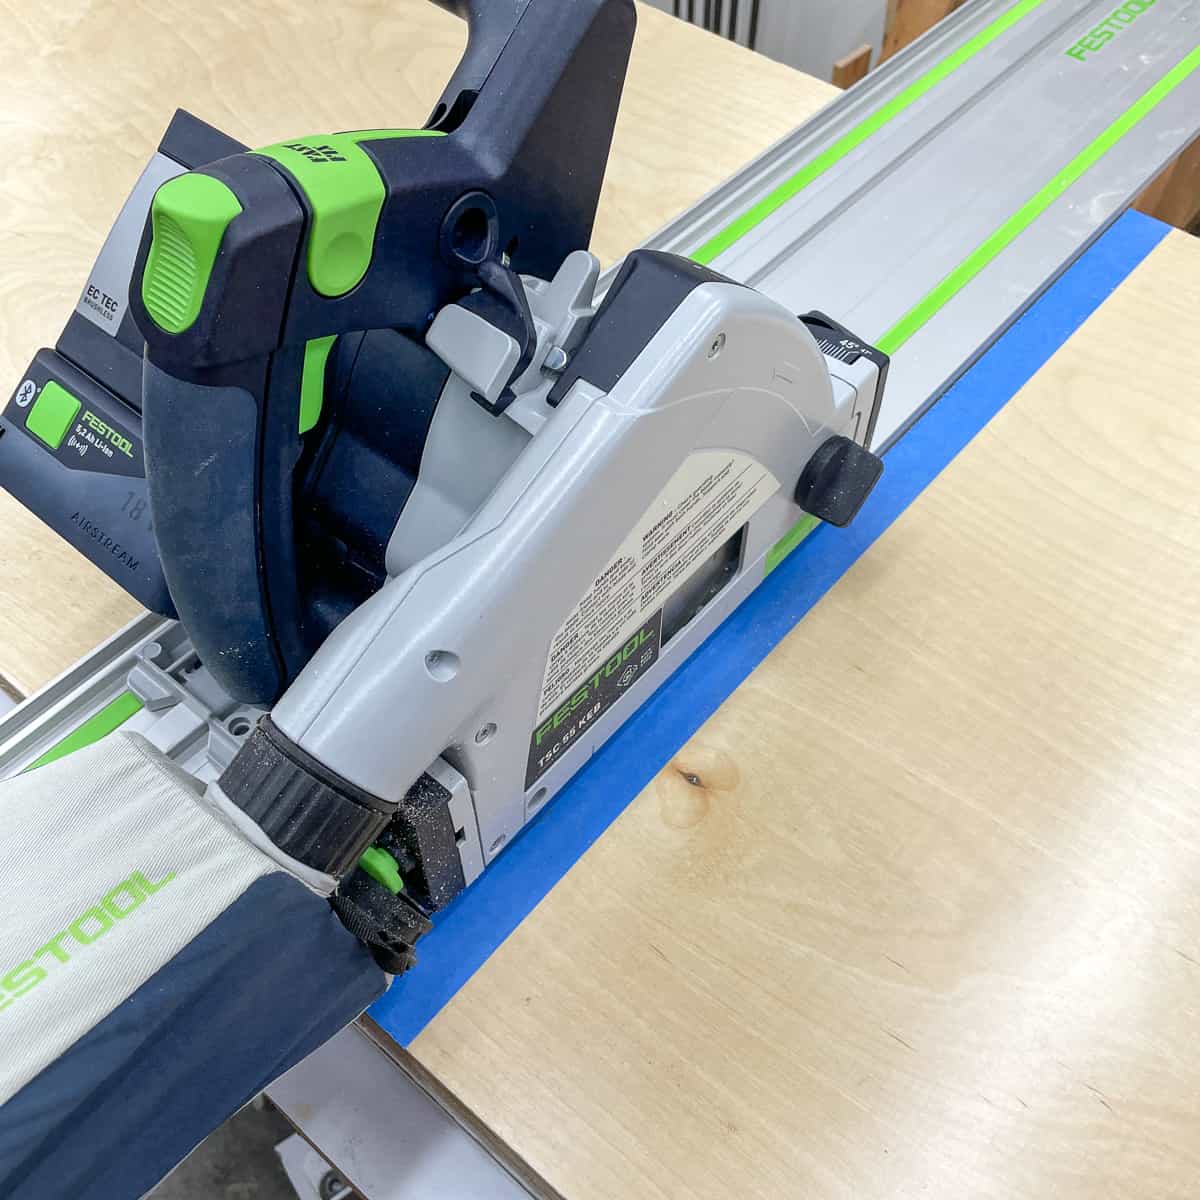
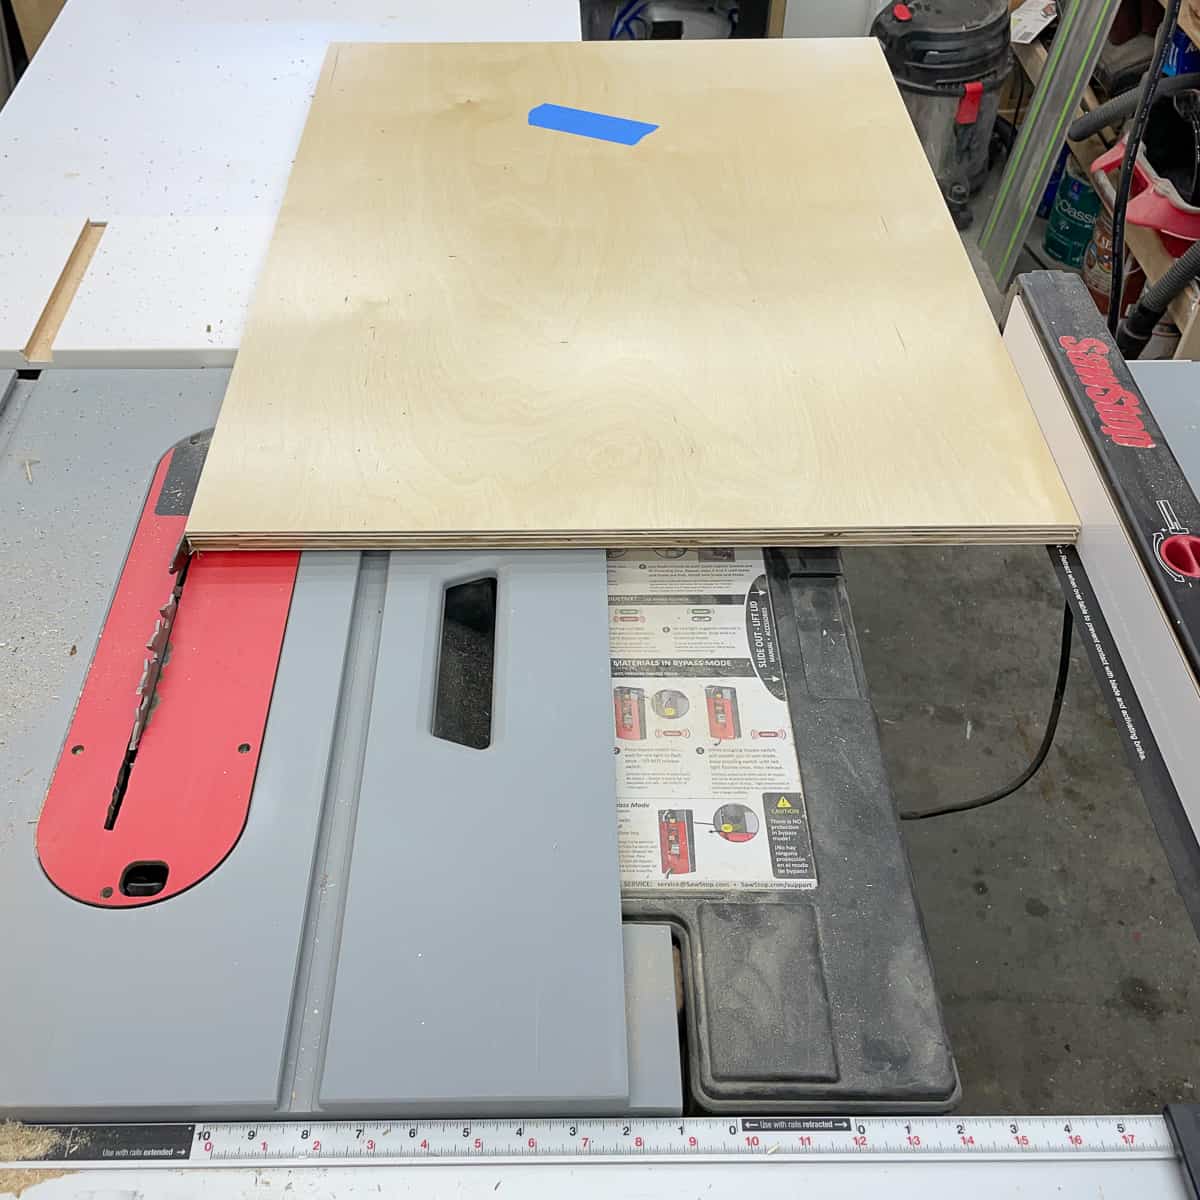
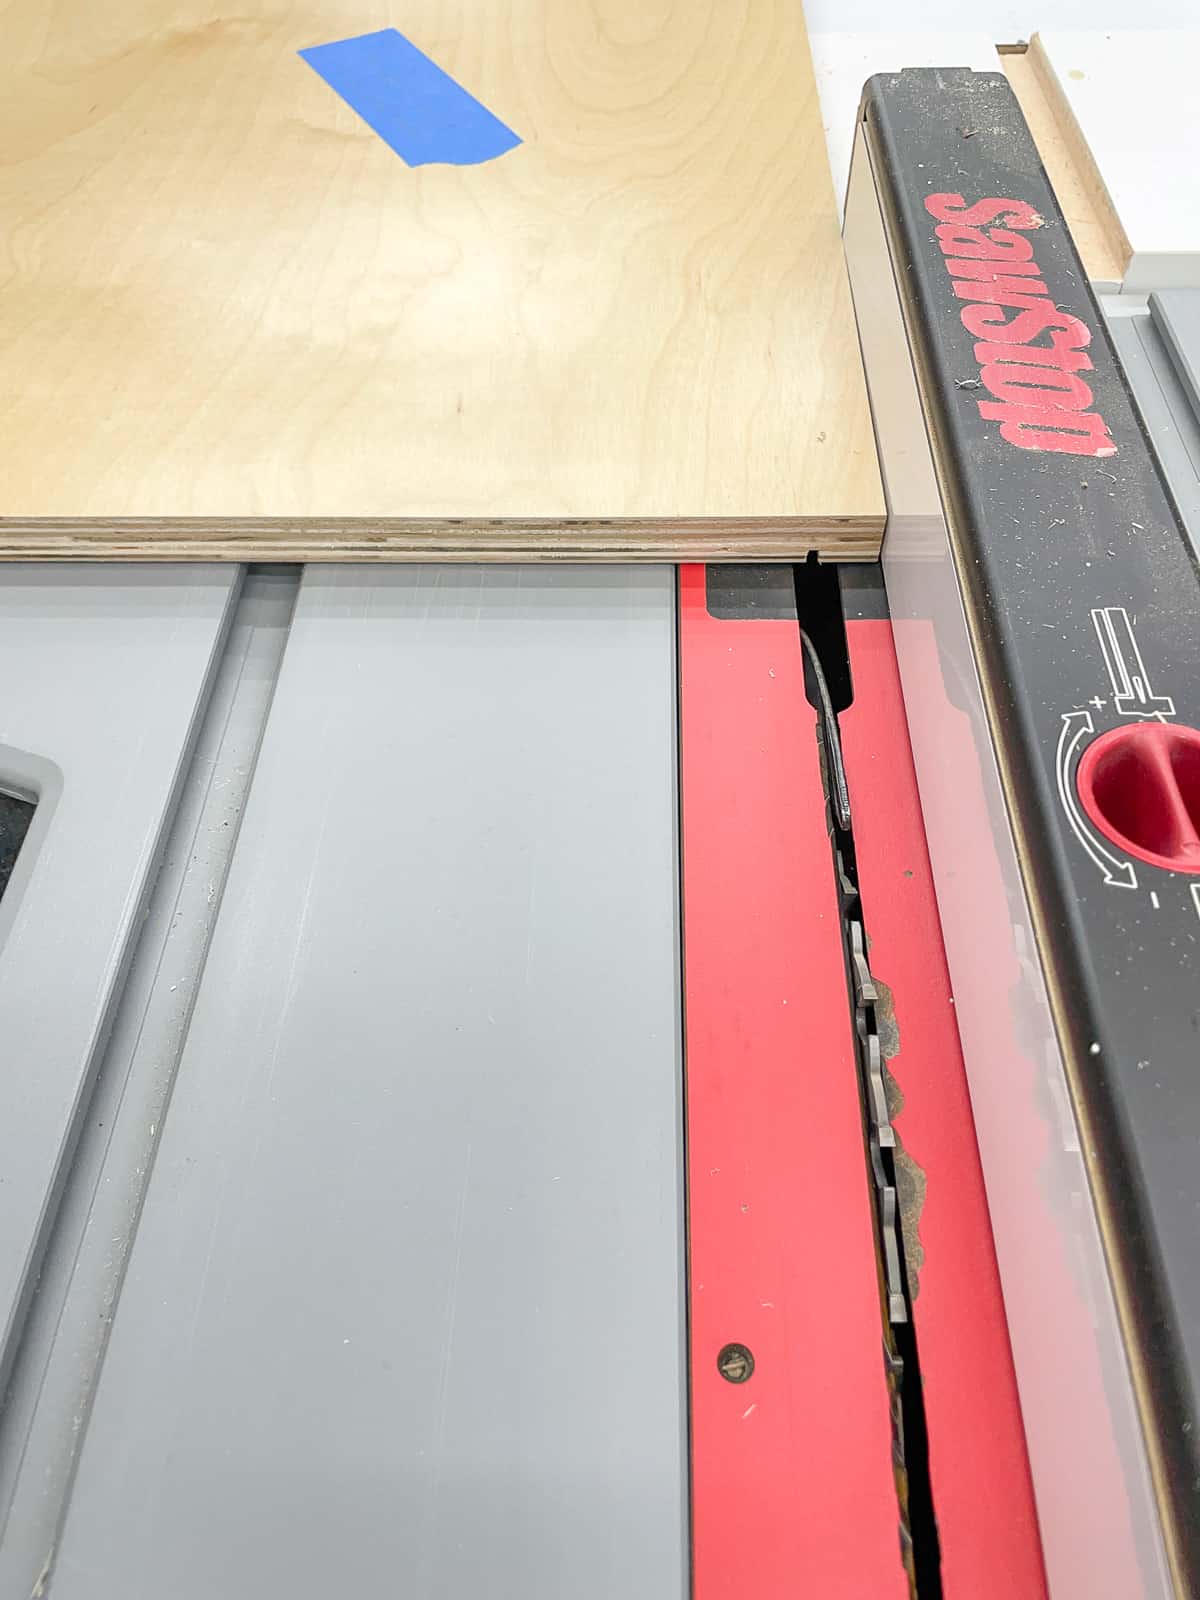
Once each chiffonier piece is cut to the correct peak with the track saw, it can finally fit on the table saw! Trim off the rough, splintered edge that the store's saw made downwards the middle first, using the factory edge against the fence.
For the final cut, move the debate to the last width to remove the factory edge. Use this fence setting for all the side and bottom pieces, and so they'll exist exactly the same size.
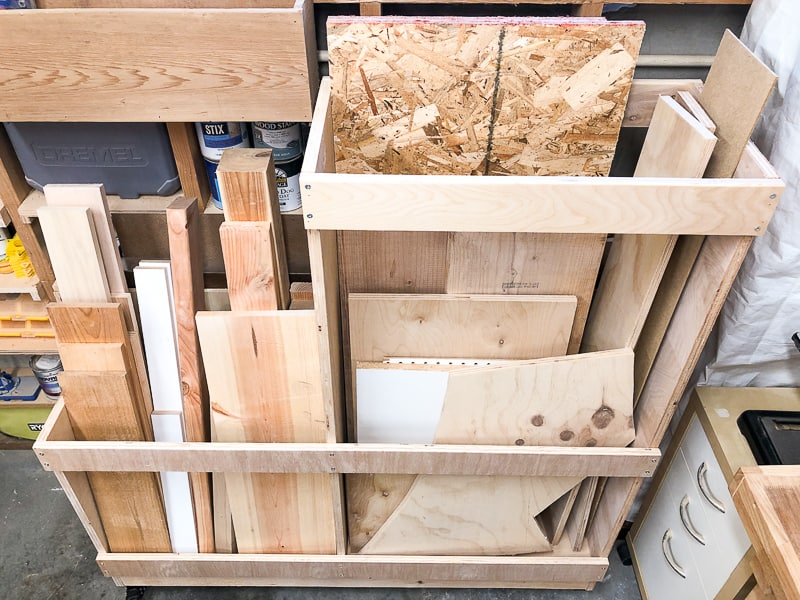
Utilise leftover ¾" plywood to cutting 4" broad strips for the front and back stretchers. I usually dig around in my scrap lumber cart for the nailer strip pieces, since they'll exist hidden backside the back of the cabinet.
Finally, cut the back panel out of ¼" plywood. It should be ¾" less than the height and width of the finished cabinet box. Information technology will be recessed into the grooves that will exist cut in the adjacent stride.
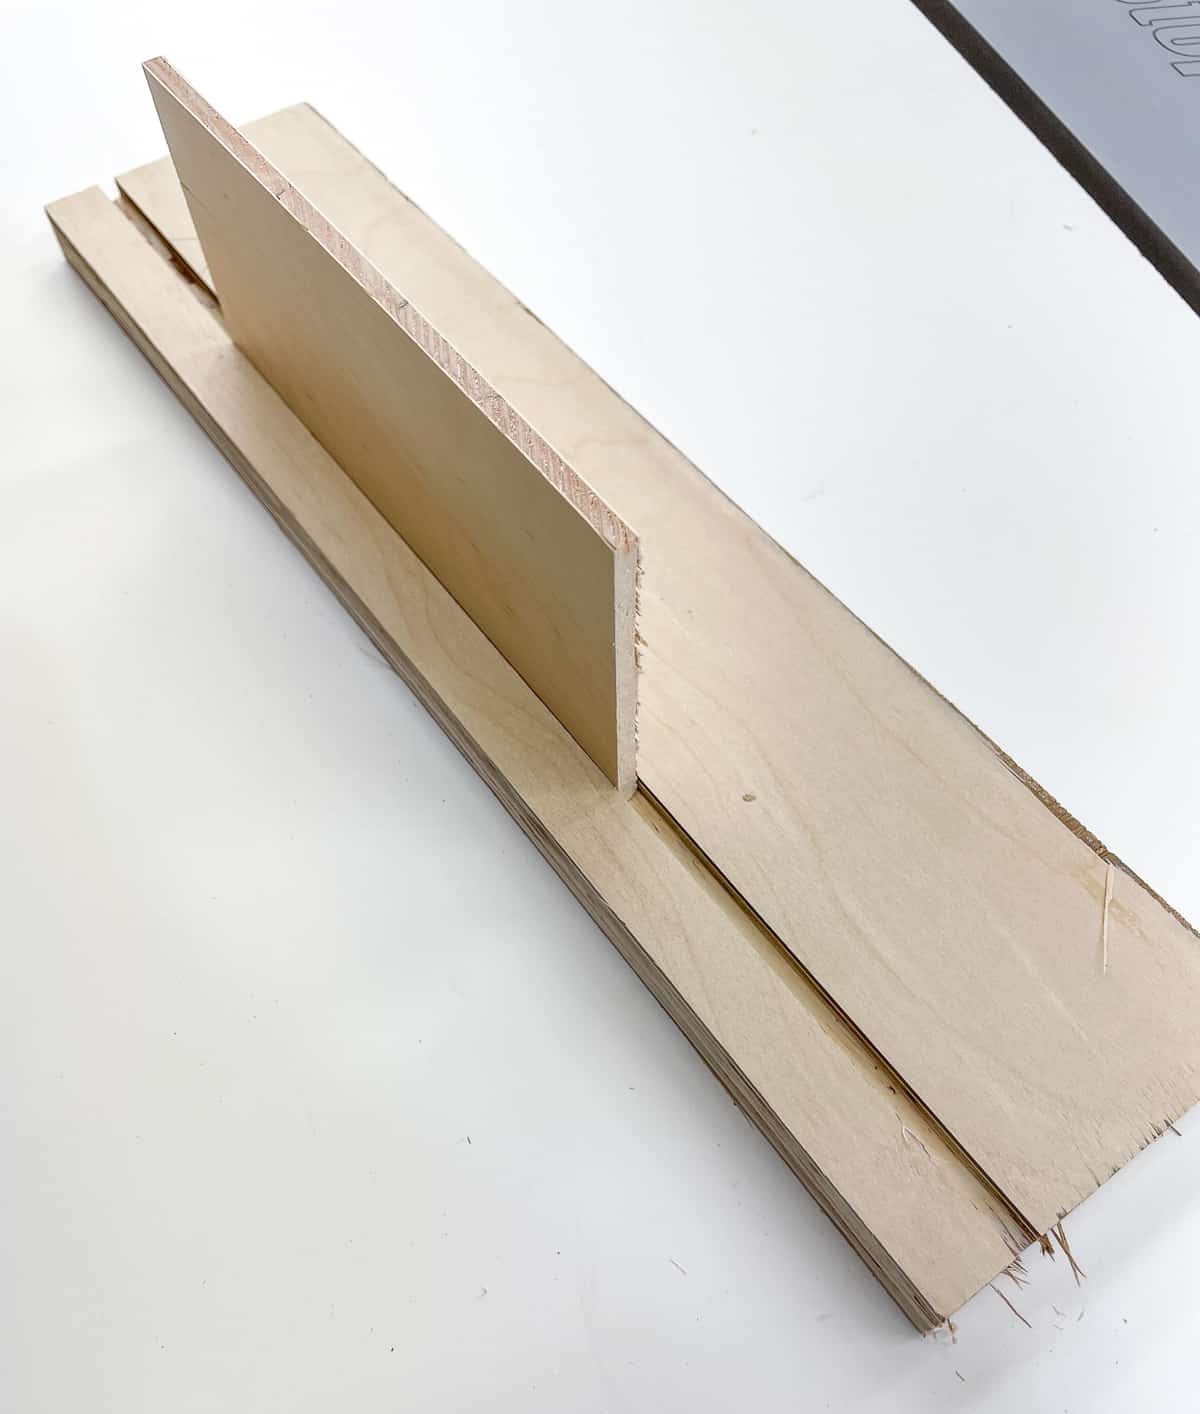
Cut the grooves for the back panel
There are a few unlike ways to attach a cabinet back panel. I prefer to cut a groove for the panel to slide into. It's quick and easy to do at the table saw, and it hides the nailer strips.
The groove is ¾" from the back of the cabinet, then the nailer strips can fit behind it. Use the nailer strip to set the table saw fence. ¾" plywood isn't exactly ¾", and then this will give y'all a more than authentic measurement.
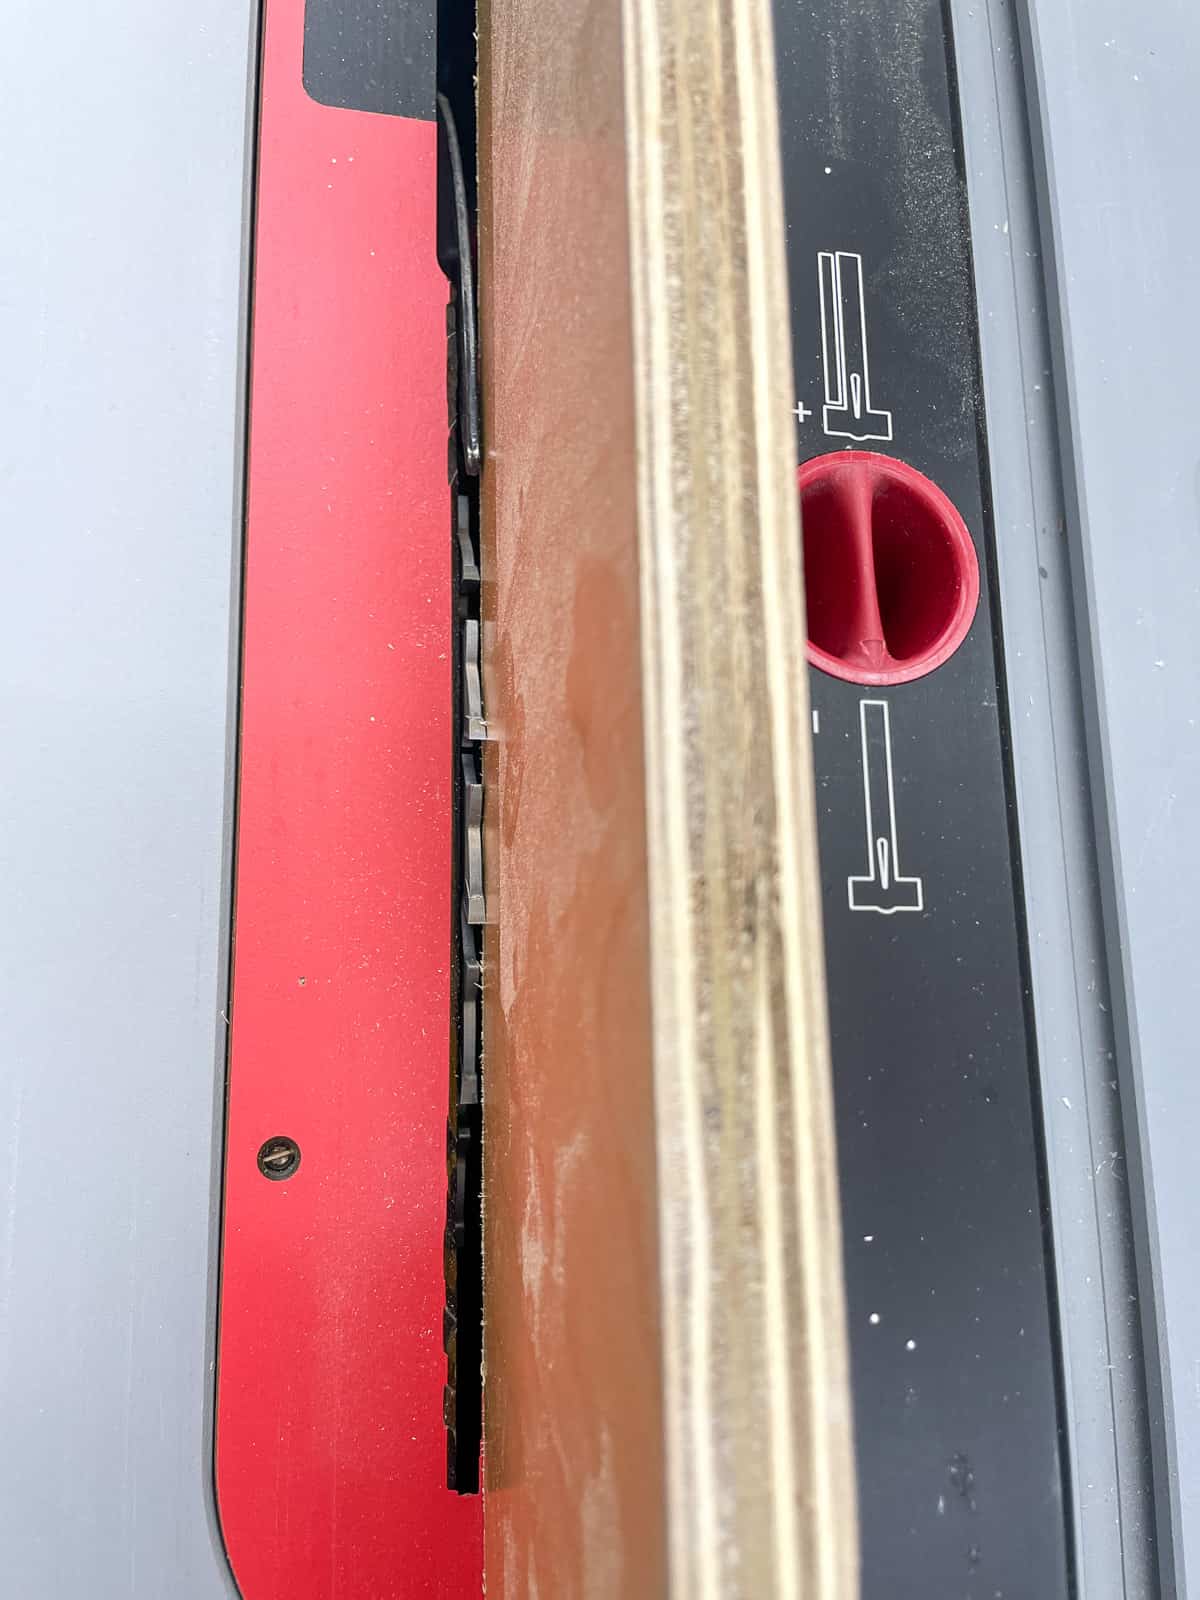
Set the table saw blade height to anywhere between ¼" and ⅜", and then it cuts a 3rd to halfway through the ¾" plywood. Make a test cutting with the scrap piece of plywood. If everything looks good, ready the test piece aside (you'll need it later!)
Cut the groove along the dorsum edge of the side, bottom and back stretcher on the "good" face of each piece with this table saw setting.
Now, take hold of your test piece over again. Move your table saw debate slightly farther abroad from the bract. I prefer to go about one-half a bract's width abroad to starting time with. Make a examination cut to widen the groove.
Check the fit of the ¼" plywood in the groove. If it doesn't fit, move the fence over a tiny bit and cut it again. Y'all want to get this fit tight plenty to concur the dorsum console in identify, but not then tight that it can't slide within the groove. It'southward amend to make multiple cuts to sneak upwardly on the fit, rather than cutting it also loose the offset time.
Once you take the fit dialed in, cut the wider grooves on the aforementioned sides, bottom and back stretcher pieces.
Apply edge banding to the front edges
If y'all're making frameless cabinets, you'll need to apply edge banding to all the front edges to hide the plywood layers. This includes the bottom, sides and front stretcher pieces.
Cutting the edge banding to the length of your plywood piece and atomic number 26 information technology on. I used prefinished birch edge banding to match the rest of the chiffonier, so I don't have to paint or finish the edges. This special trimmer rapidly cuts the sides flush with the plywood.
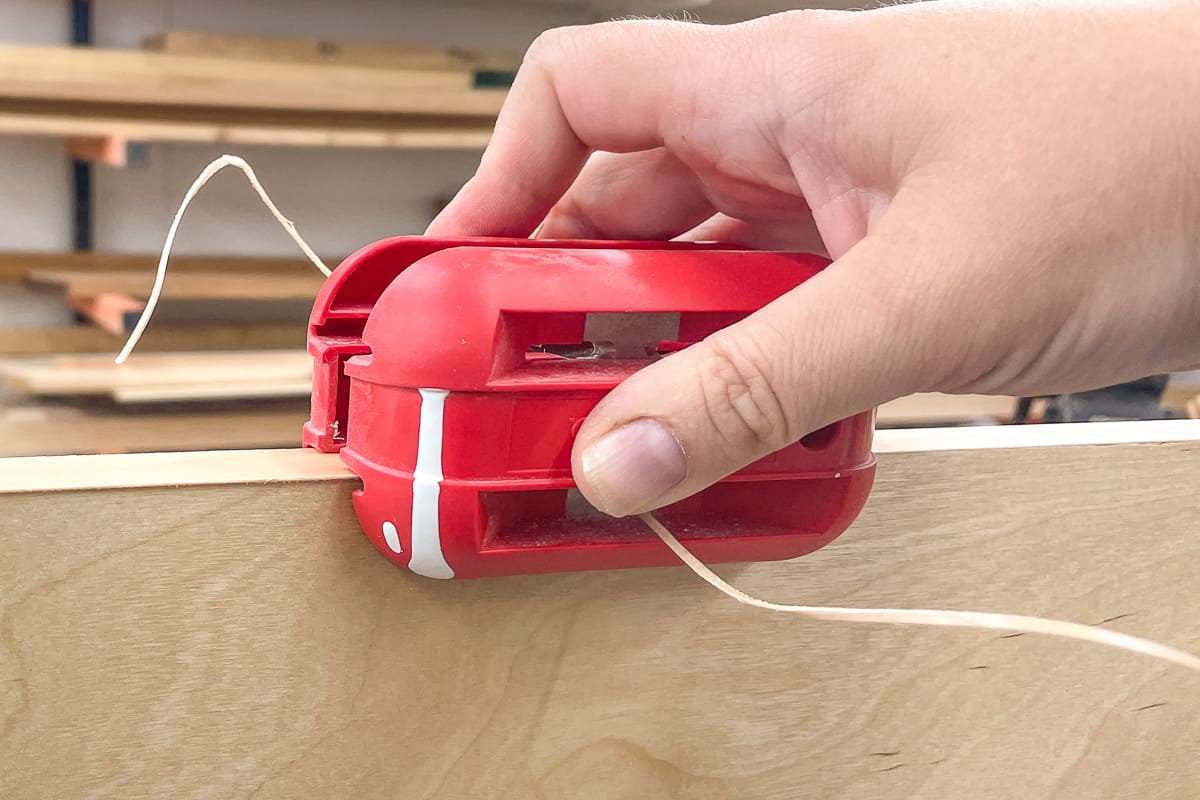
I have a full tutorial on how to apply edge banding if you lot want more information on this technique.
Drill pocket holes
The bottom, stretchers and nailer strips all require pocket holes along the ends. These pocket holes should exist drilled in the reverse side from the groove, making sure you don't drill through information technology.

You can learn more well-nigh how to use a Kreg Jig here. Go on in mind that y'all should set the drill bit depth terminate to slightly less and so ¾" to account for the undersized plywood thickness.
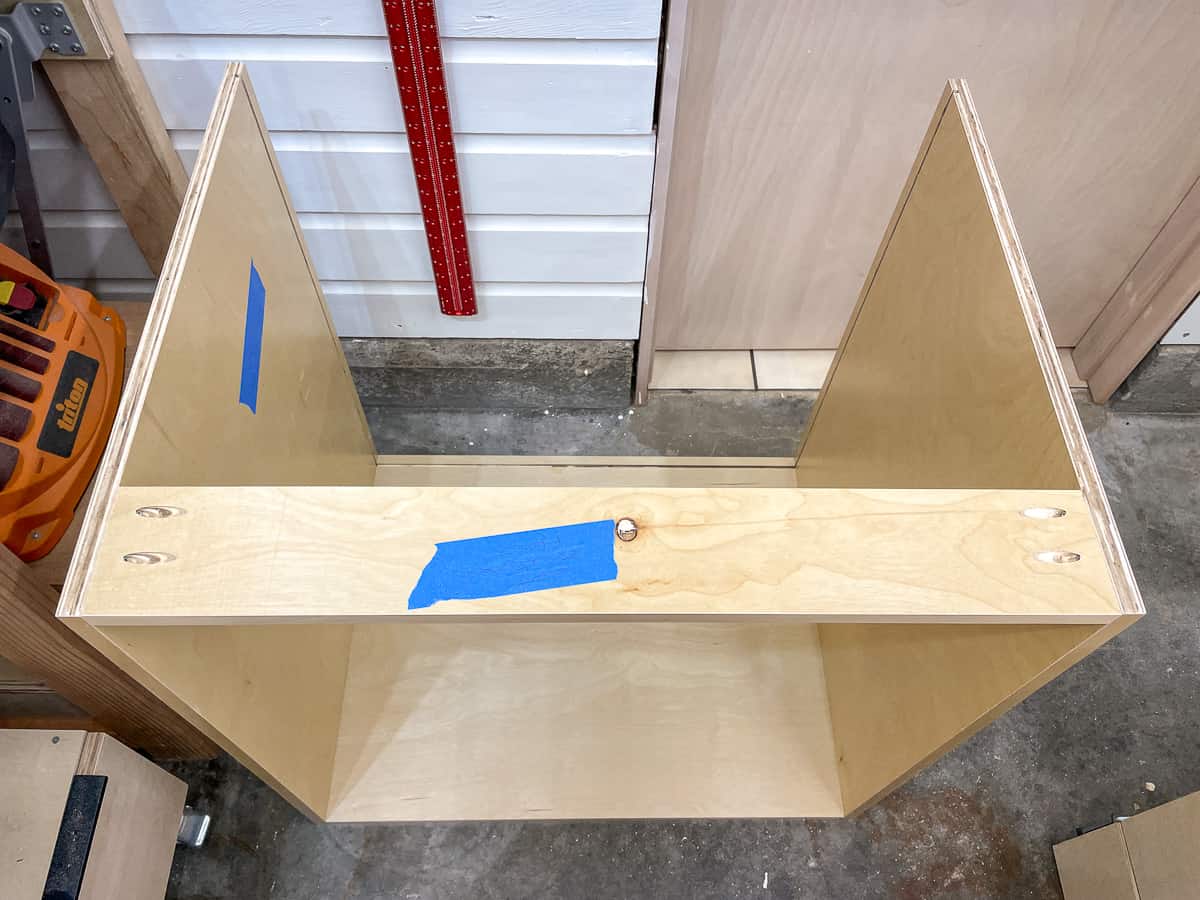
Attach the lesser to the sides
Finally, information technology'southward time to offset building this chiffonier box! If everything was prepared correctly, this process should exist actually quick!
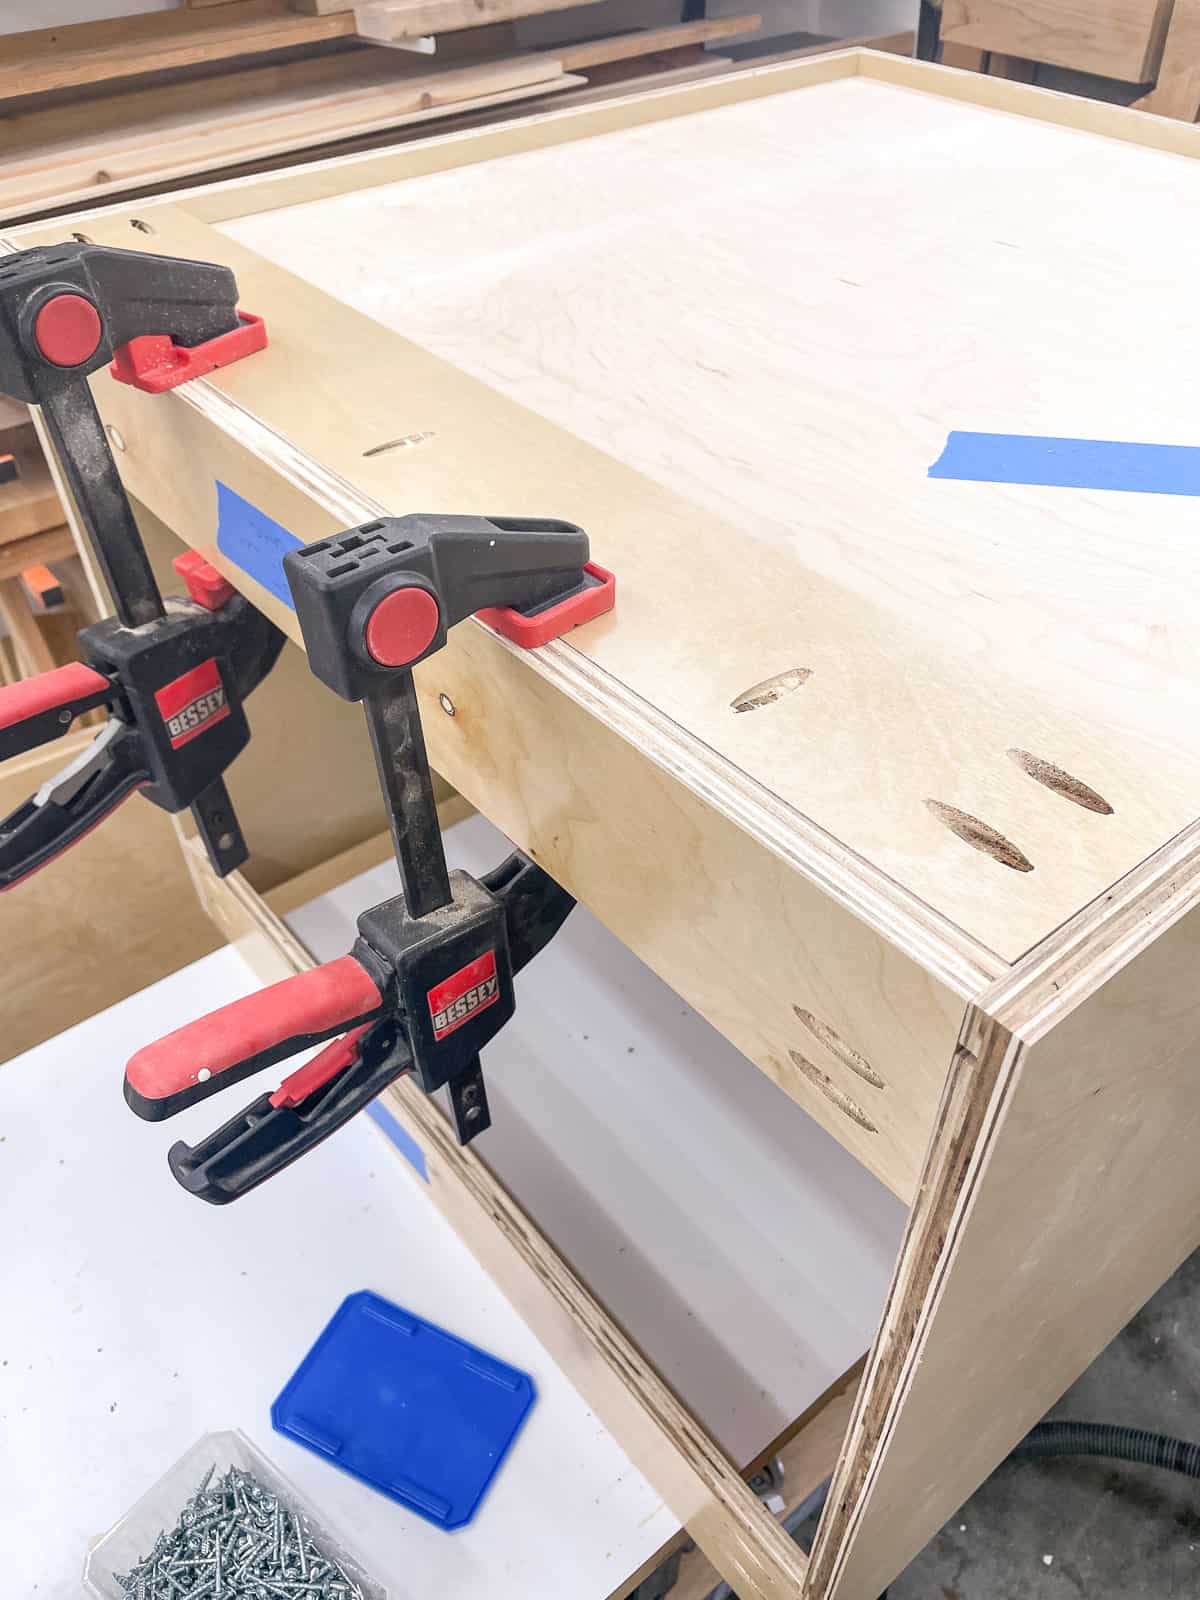
Start past attaching the bottom to the sides with 1 ¼" pocket hole screws. Make sure that all the border banded sides are facing the same direction, and the grooves line upwardly all the way effectually.
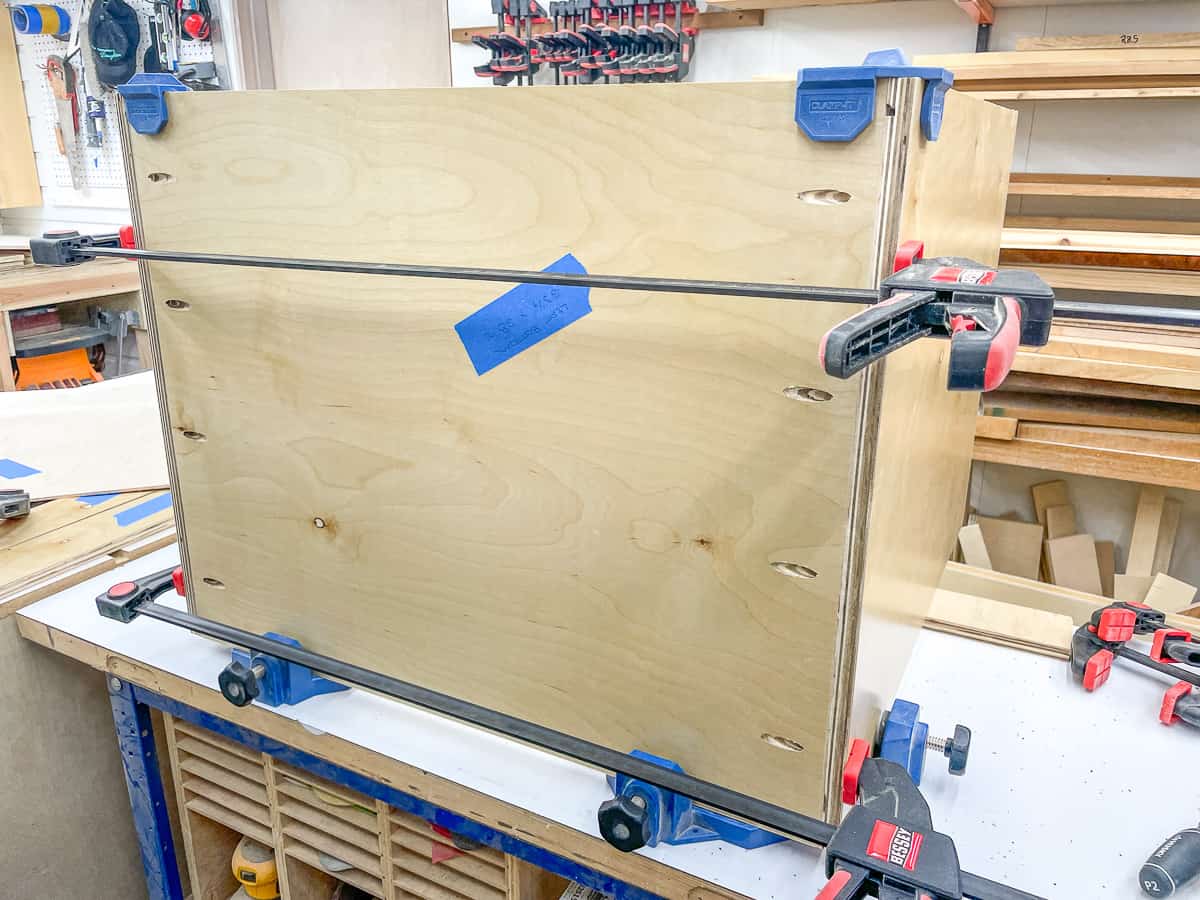
I highly recommend these Rockler corner clamps if y'all're assembling more than a few cabinet boxes. They act similar another set of hands, belongings those large plywood pieces together at a perfect right bending. I besides apply a couple long clamps in the middle and so the edges don't shift every bit I'one thousand driving in the screws.
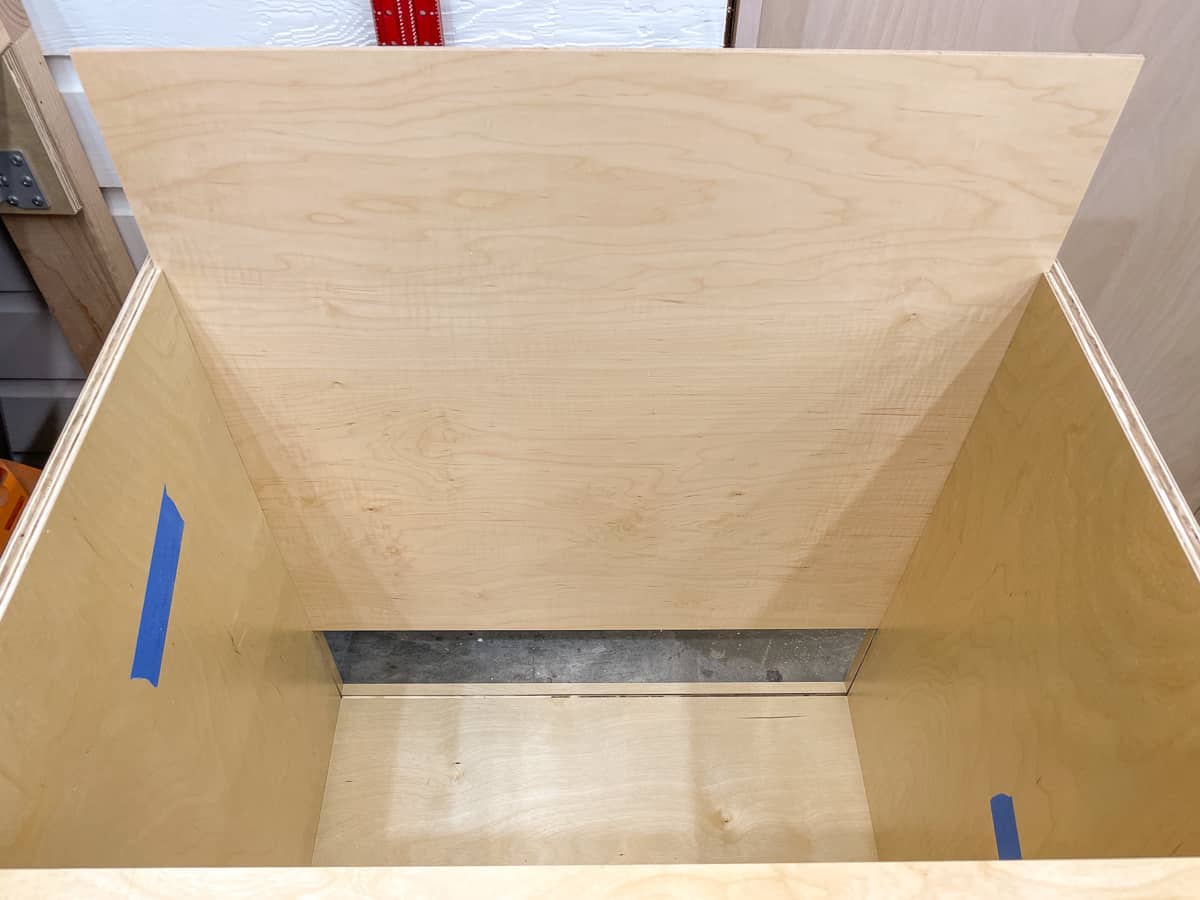
Adhere the front stretcher
The front stretcher is the slice with pocket holes on the ends, border banding on the front end, and no groove cutting into it. Information technology will square upwardly the chiffonier box and serve as the cabinet door or drawer stop forth the top. It too gives you something to screw into when attaching the countertop to the cabinet box.
With the cabinet box facing down on the workbench, clamp the forepart stretcher between the 2 sides. Attach the front stretcher to the sides with 1 ¼" pocket hole screws.
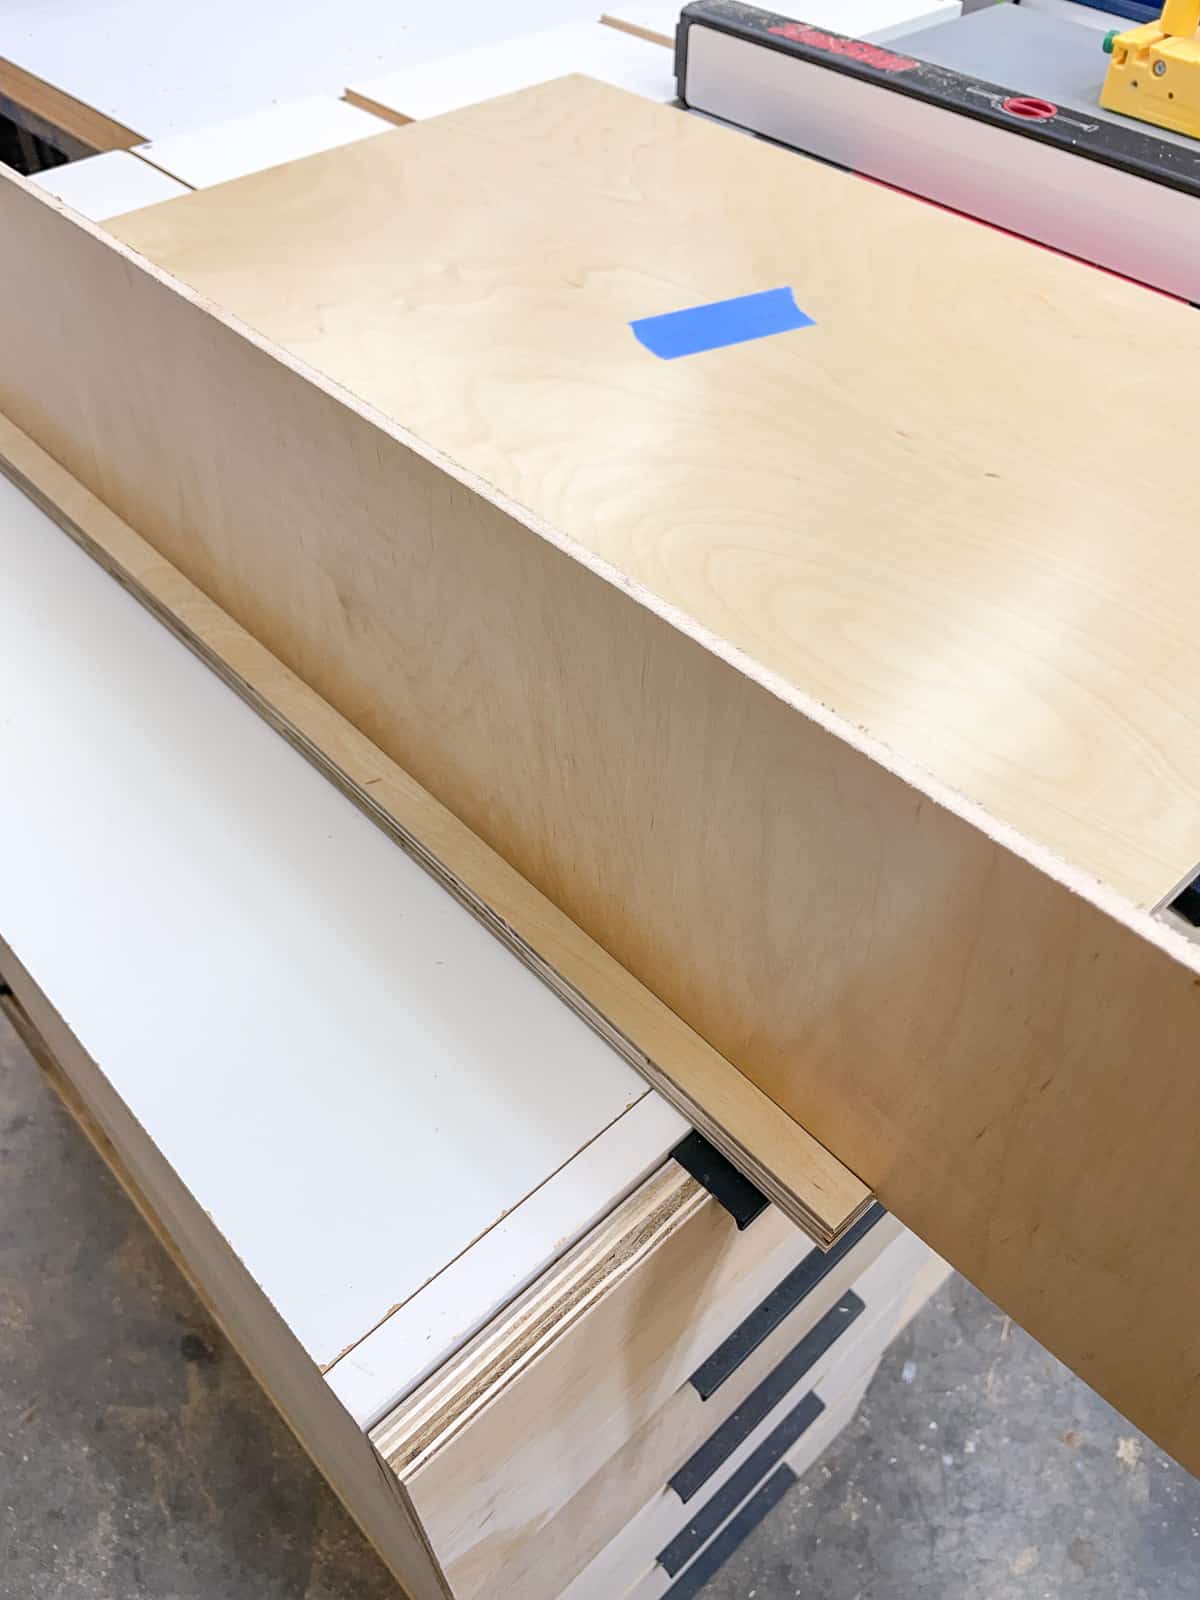
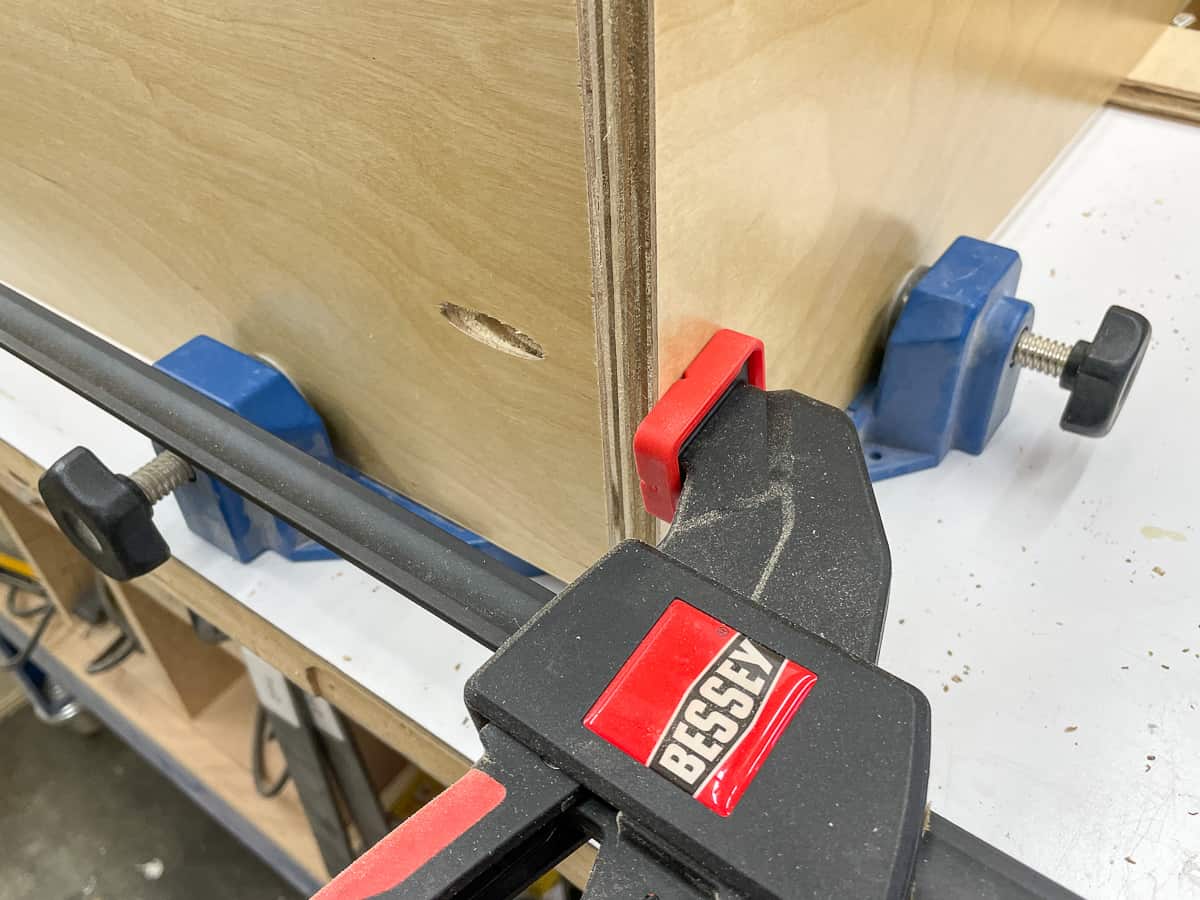
Insert the back console
The ¼" cabinet dorsum console should slide smoothly into the grooves in the back. Think that the "skilful" side of the plywood should face into the cabinet! Technically, the grain direction of the back console should be vertical instead of horizontal, merely this will be hidden behind drawer boxes then it doesn't really affair here.
The back stretcher with the groove cut into it should fit right on top of the ¼" plywood, locking the console into place.
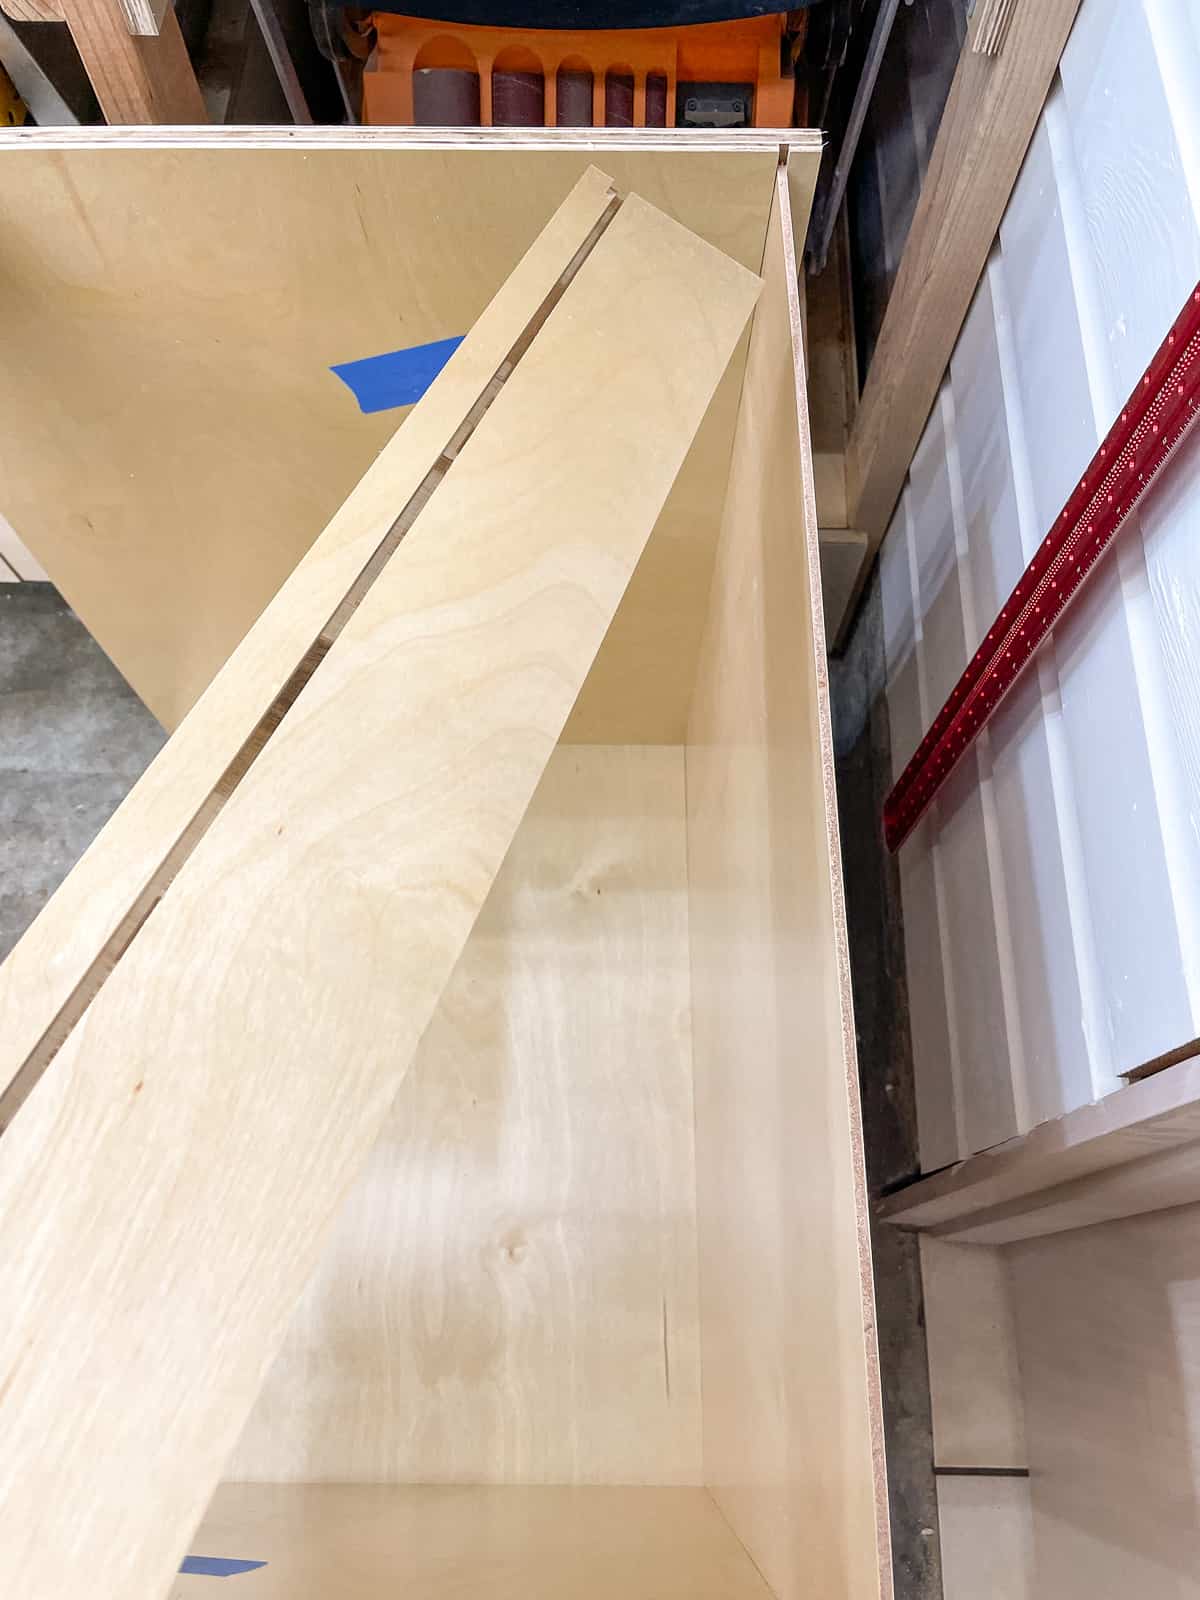
Use a clamp to concord the back stretcher flush with the height of the sides while yous drive in the ¼" pocket hole screws.
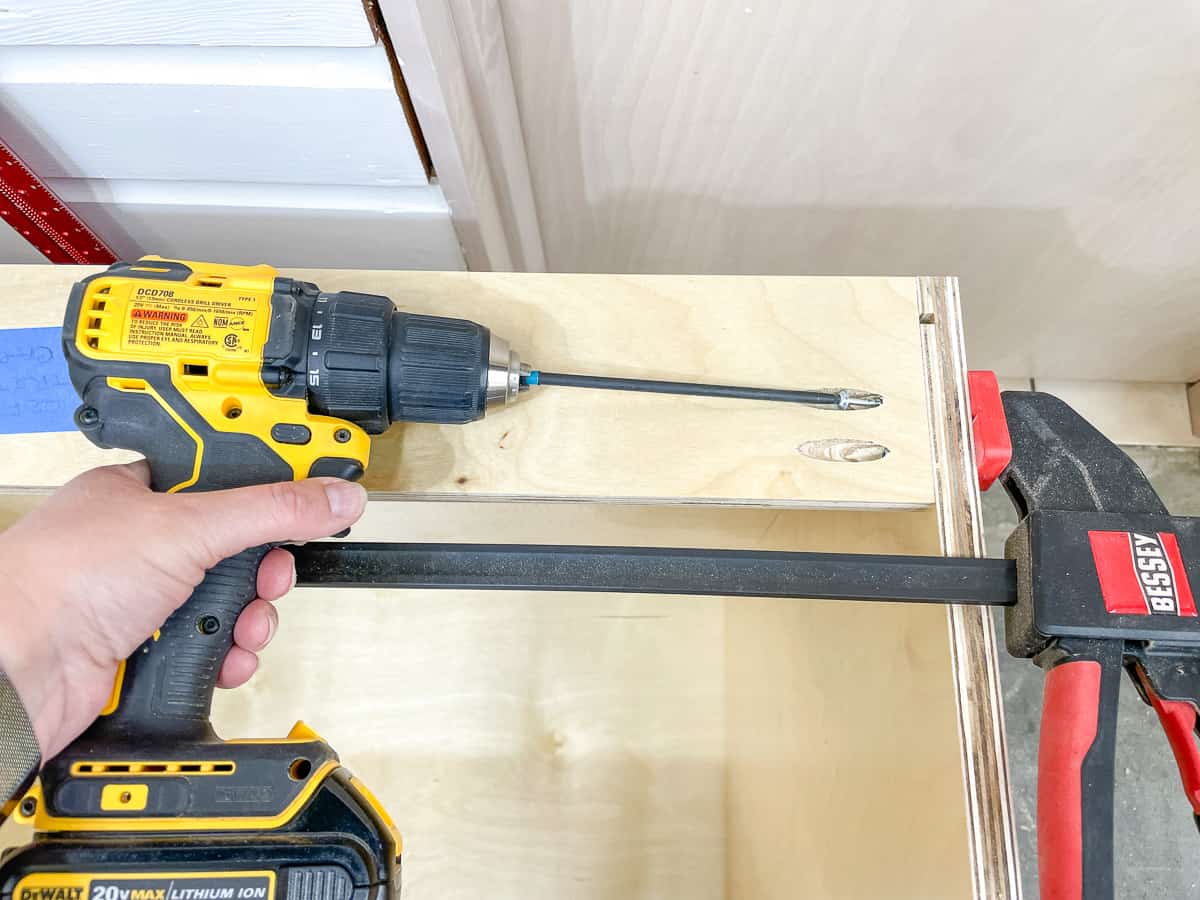
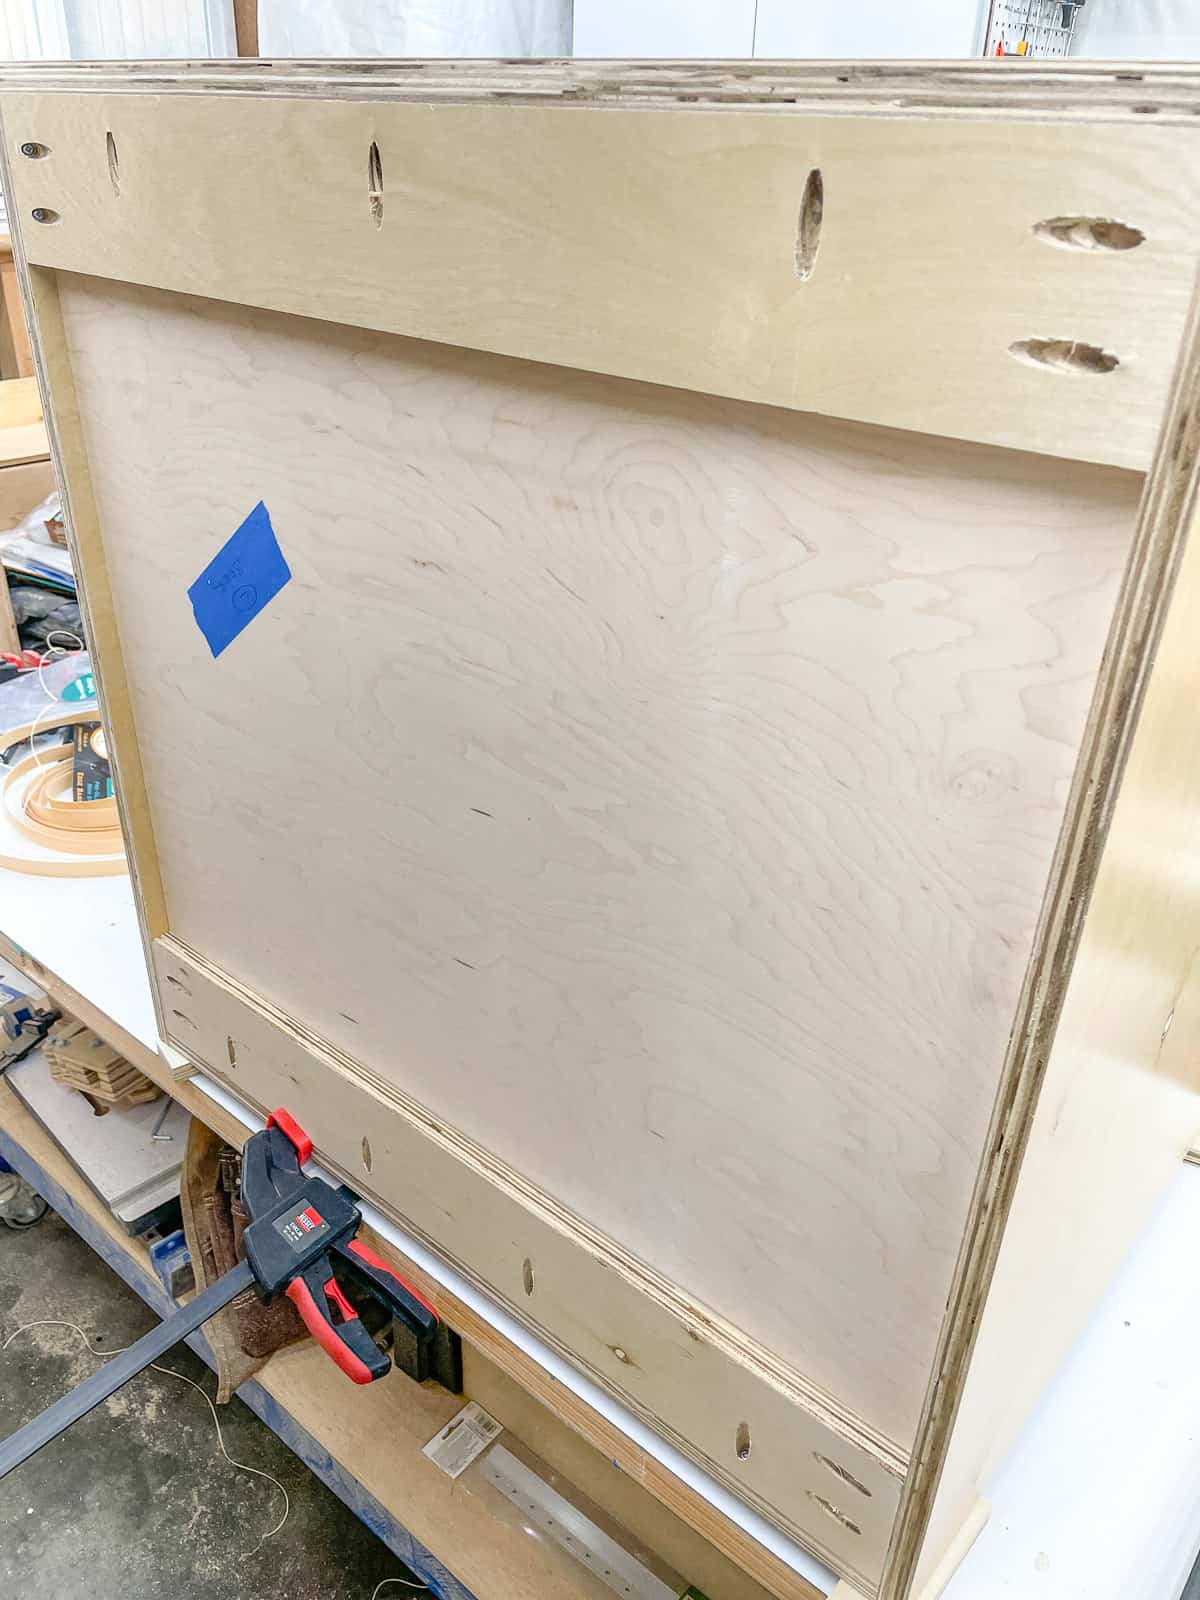
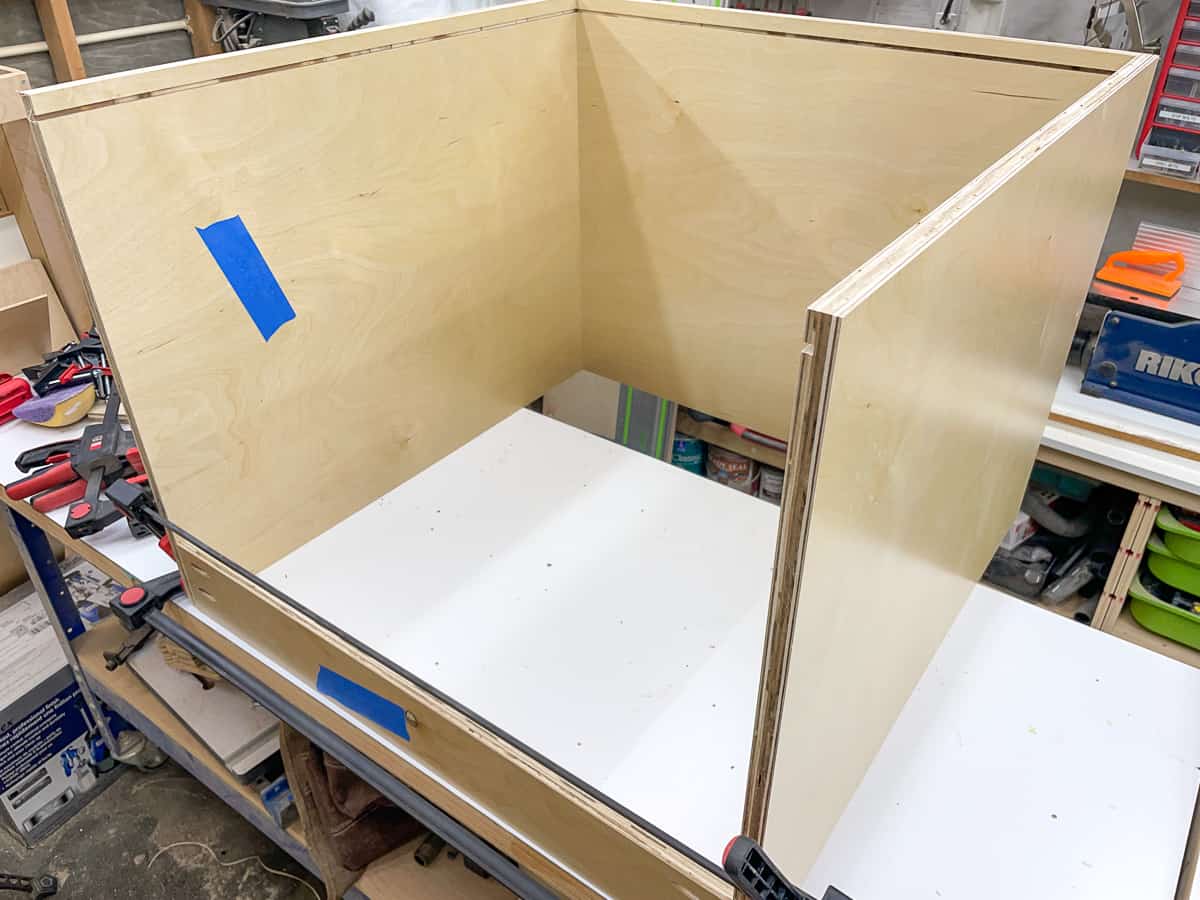
Attach the nailer strips
The nailer strips give you a solid board to screw through when attaching the cabinet box to the studs in the wall. Some people only attach a nailer strip to the peak of the cabinet to save on materials. I like to accept one at the top and the bottom, since we accept less than directly walls and the chiffonier box is usually only touching the wall in one of those spots.
Flip the cabinet onto its front, and identify the showtime nailer strip under the back stretcher confronting the back panel. I drilled a few extra pocket holes along the tiptop border and so that I could attach it to both the sides and the top.
Repeat the process for the bottom nailer strip.
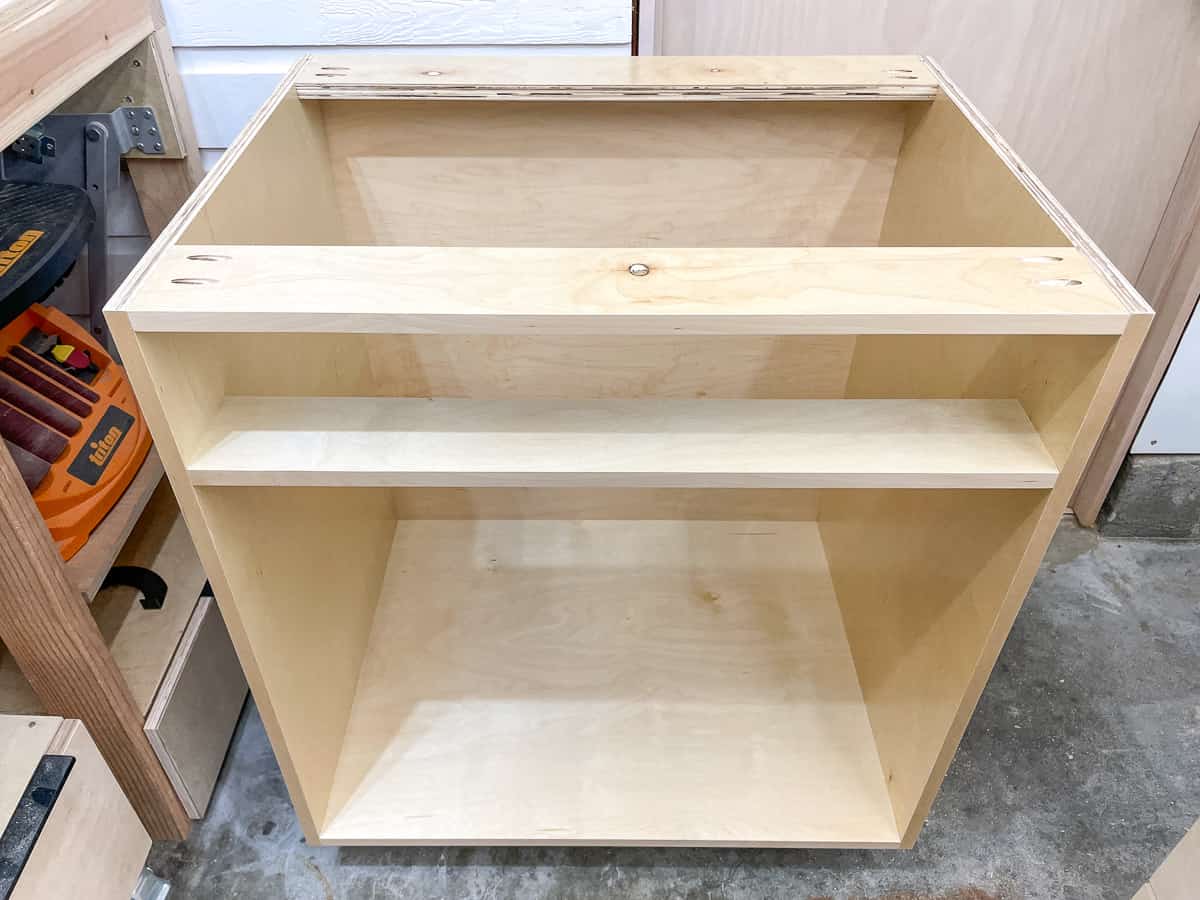
Add drawer supports (optional)
If you program to install drawers, yous'll need an boosted piece underneath each i. This will support the undermount drawer slides I plan to apply, and information technology also serves every bit a terminate for the lower chiffonier doors.
The drawer support is made the same fashion as the front stretcher. Cut it to fit inside the chiffonier, with edge banding across the front and pocket holes on both ends.
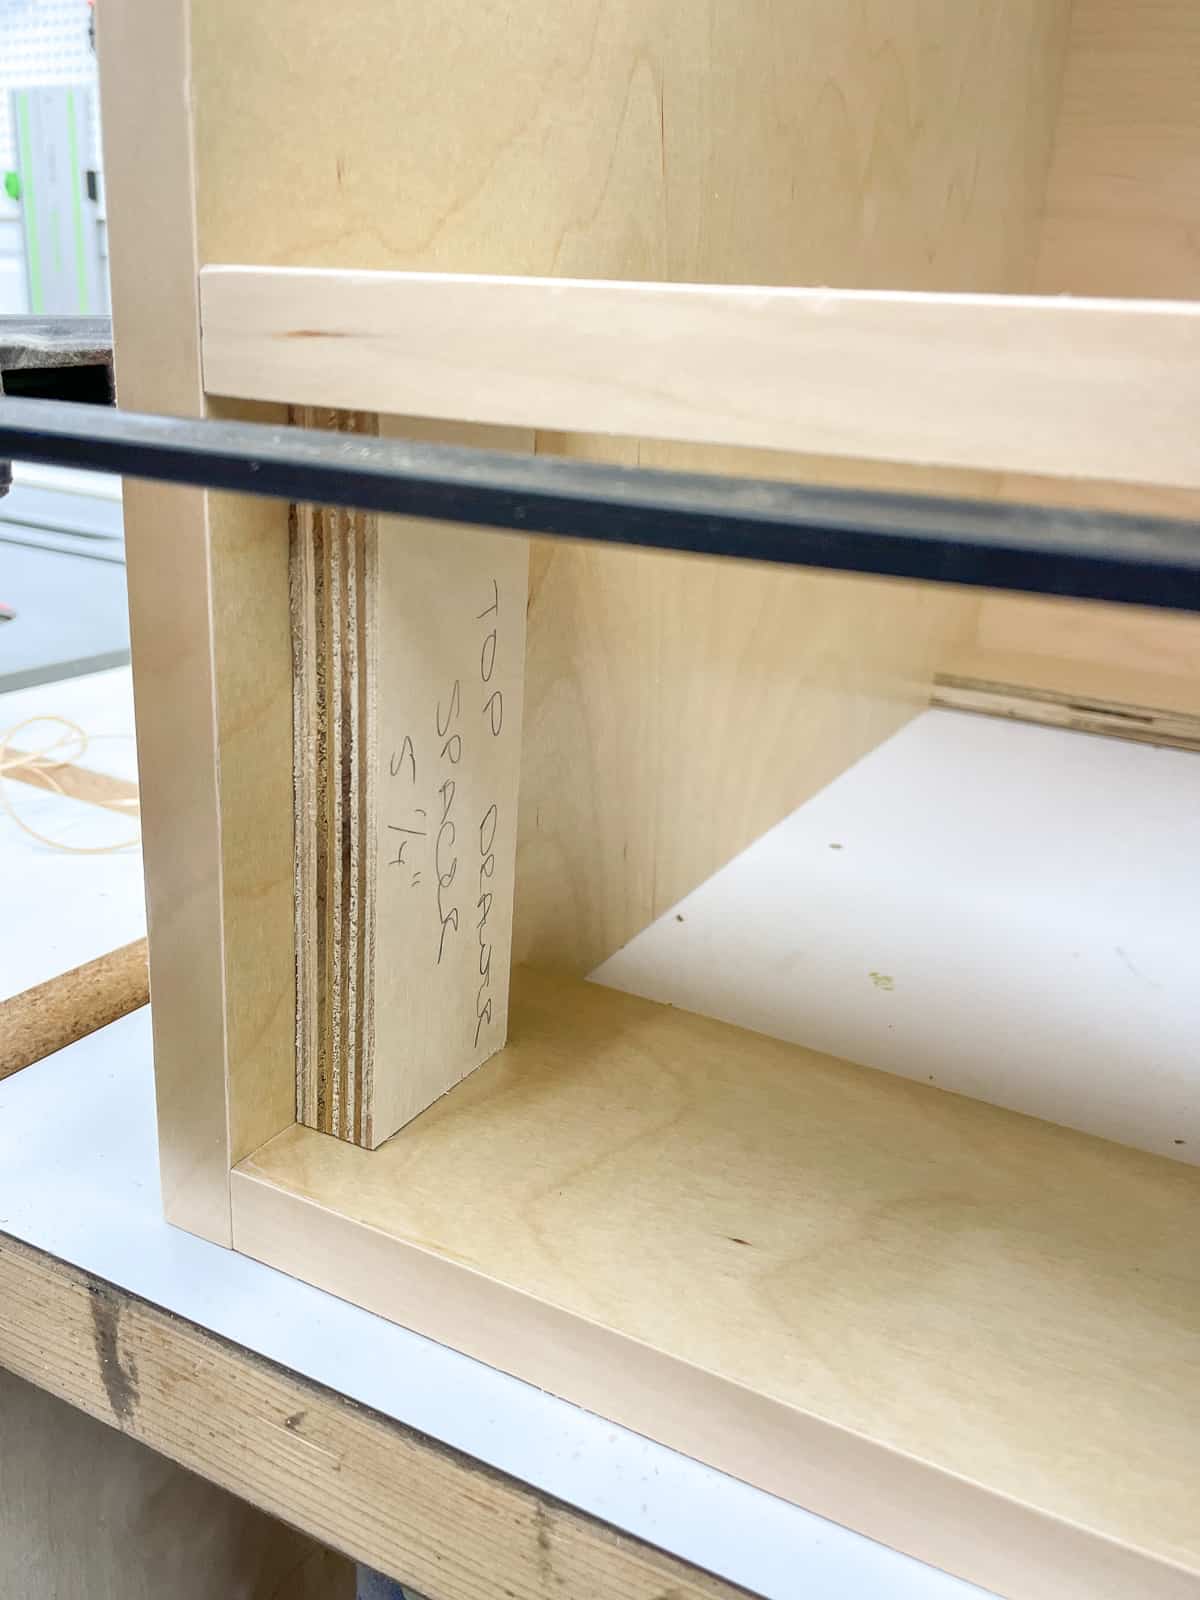
To ensure equal spacing beyond all your cabinet boxes, cut some spacers to the size of the drawer space. I always clearly label these then they don't accidentally end up in the trash! Flip the cabinet onto its top, and place the spacers on peak of the front stretcher. Then place the drawer support on meridian, clamp it into place and secure it with pocket hole screws.
Congratulations, you lot just finished building a basic cabinet box!
Get together the toe boot platform
The toe kick can be fabricated from 2x4s or any ¾" textile. It'll be hidden backside the toe kick molding after it's installed, so it doesn't matter what it looks like. Only make sure to stick to one height across all the platforms!
The width of the toe kick platform should friction match the width of the cabinet. The depth tin can vary depending on how deep you lot desire your recess to exist. Anywhere between three" and 4" tall and deep is standard.
When I tore out my quondam kitchen cabinets, I discovered that some of them were installed earlier the tile, leaving a sunken area. I filled it in with ¼" cement lath, but it nonetheless isn't quite flush. I made the toe kicking recess 3" deep and so that it could sit on the tile instead of the uneven surface behind. Yet another reason why I prefer the dissever toe kick!
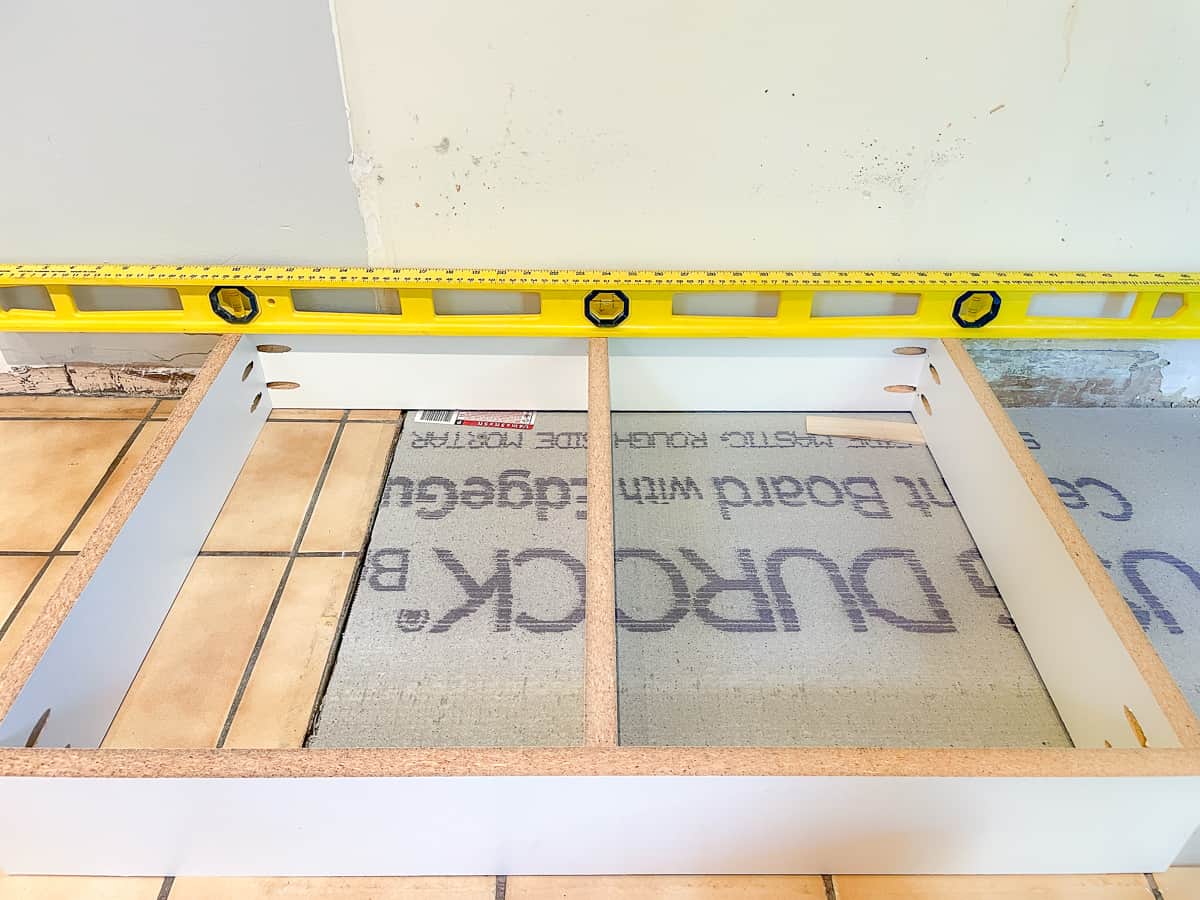
The cabinet box sits on top of the platform, and both the platform and the cabinet are secured to the wall at the studs. I'll go into more detail about how to level and install the toe kick platform and the cabinet here. It'southward not as difficult as y'all might call back!
Now that you know how to build a simple cabinet box, yous can build an entire kitchen! If you batch out each footstep, yous can put together multiple cabinets in a weekend. Next, I'll bear witness you how to build a drawer to go inside your new base of operations cabinets!
Check out these other kitchen remodel projects!
Source: https://www.thehandymansdaughter.com/simple-cabinet-box/
0 Response to "How to Build a Kitchen Sink Cabinet Easy"
Post a Comment